
Air fryers have become one of the most popular kitchen appliances because they make it easy to cook crispy, delicious meals with less oil. Whether you’re preparing chicken wings, fries, vegetables, or frozen snacks, your air fryer likely gets plenty of use. But like any appliance that handles food and grease, it needs regular cleaning to keep performing at its best.
If you’ve noticed smoke coming from your air fryer, lingering food odors, or grease stuck to the basket, it’s probably time for a proper cleaning. The good news is that learning how to clean an air fryer properly doesn’t take much time, and a simple routine can help prevent bigger cleaning jobs later.
In this step-by-step air fryer cleaning guide, you’ll learn how to clean every part of your air fryer safely, including the basket, drawer, interior, and heating element. We’ll also cover how to remove stubborn grease, burnt food, and unpleasant odors without damaging the nonstick coating. By following these simple steps, you can keep your air fryer working efficiently and extend its lifespan.
Why Cleaning Your Air Fryer Is So Important
Cleaning your air fryer isn’t just about keeping it looking nice. Food residue, grease, and crumbs can build up surprisingly fast, affecting how well the appliance cooks and even creating safety concerns. Making air fryer cleaning part of your kitchen routine helps your meals taste better while protecting your investment.
Prevents Smoke During Cooking
One of the most common complaints from air fryer owners is seeing smoke while cooking. In many cases, the appliance itself isn’t faulty. The real problem is grease or food particles left behind from previous meals.
As grease collects on the basket, drawer, or heating element, it can burn the next time you cook. This creates smoke that fills the kitchen and may even leave a burnt smell on your food.
Cleaning your air fryer after each use removes these leftovers before they become a problem. Even a quick wipe-down can significantly reduce the chances of smoke during your next cooking session.
Improves the Taste of Your Food
Old grease and burnt crumbs don’t just smell bad—they can also affect the flavor of freshly cooked meals.
Imagine cooking fresh salmon in an air fryer that still contains grease from last night’s chicken wings. Those leftover oils and food particles can transfer unwanted flavors and odors to your new meal.
By following a regular air fryer cleaning guide, every meal starts with a clean cooking surface, allowing the natural flavors of your food to shine through.
Extends the Life of Your Air Fryer
Air fryers are built to last, but neglecting regular maintenance can shorten their lifespan.
Grease buildup forces the appliance to work harder, while food debris may block airflow inside the cooking chamber. Over time, this extra strain can reduce cooking efficiency and potentially damage internal components.
Regular air fryer maintenance helps protect the fan, heating element, and nonstick surfaces, keeping your appliance performing as intended for years.
Think of cleaning as preventive maintenance. Spending a few minutes after cooking is much easier than dealing with expensive repairs or replacing the appliance early.
Helps Maintain Even Airflow
Air fryers cook by circulating hot air rapidly around your food. This constant airflow is what creates the crispy texture many people love.
However, grease, crumbs, and burnt food can partially block vents or coat internal surfaces. When airflow is restricted, your air fryer may cook unevenly, leaving some foods overcooked while others remain undercooked.
Keeping the basket, drawer, and interior clean allows air to circulate freely, helping your food cook more evenly and consistently every time.
Reduces Bad Odors
Have you ever opened your air fryer and noticed an unpleasant smell before you even started cooking?
Odors often come from grease that has hardened onto the basket or food residue hidden beneath the heating element. Every time the appliance heats up, those smells return.
Learning how to clean an air fryer properly helps eliminate these odor-causing residues before they become a recurring issue. Regular cleaning also reduces the chance of your fresh meals picking up unpleasant smells from previous cooking sessions.
Makes Deep Cleaning Easier
Many people wait until their air fryer becomes heavily coated with grease before cleaning it thoroughly. Unfortunately, the longer grease sits, the harder it becomes to remove.
Cleaning the basket and wiping the interior after every use prevents stubborn buildup from forming. As a result, your monthly deep clean becomes much faster and requires less scrubbing.
A few minutes of maintenance today can save you a lot of effort later.
Protects the Nonstick Coating
Most modern air fryer baskets have a nonstick coating that makes cooking and cleaning much easier. However, baked-on grease and aggressive scrubbing can gradually wear this coating away.
When you clean your air fryer regularly using a soft sponge, mild dish soap, and warm water, there’s no need for harsh scrubbing or abrasive cleaners.
Protecting the nonstick coating means food releases more easily, cleanup stays simple, and the basket remains in good condition for longer.
Promotes Better Kitchen Hygiene
Food crumbs left inside an air fryer can attract bacteria and unpleasant odors over time, especially if the appliance sits unused for several days.
A clean air fryer creates a healthier cooking environment and reduces the chances of cross-contamination between different foods.
Whether you’re cooking vegetables one day or meat the next, starting with a clean appliance gives you greater confidence in the quality and safety of your meals.
Regular cleaning isn’t complicated, but it has a noticeable impact on how well your air fryer performs. From preventing smoke and bad odors to preserving the nonstick coating and extending the appliance’s lifespan, a simple cleaning routine goes a long way.
How Often Should You Clean an Air Fryer?
One of the biggest questions new air fryer owners ask is, “How often should you clean an air fryer?” The answer depends on how often you use it and what you’re cooking, but one rule applies to everyone: don’t wait until your air fryer looks dirty.
Grease and food residue begin building up after every meal, even if the basket appears clean at first glance. Creating a simple cleaning routine keeps your appliance working efficiently and prevents stubborn messes that take much longer to remove.
Here’s a practical schedule you can follow.

Clean the Basket and Drawer After Every Use
The basket and drawer come into direct contact with food, oil, grease, and crumbs, so they should be cleaned after every cooking session.
Even if you only cooked a small portion of fries or reheated leftovers, tiny food particles and grease can remain behind. When left inside the appliance, these residues harden as they cool and become much more difficult to remove later.
Cleaning after each use also helps prevent:
- Smoke during your next cooking session
- Burnt food odors
- Sticky grease buildup
- Cross-contamination between different foods
- Reduced cooking performance
Fortunately, this doesn’t have to be a lengthy process. Once the air fryer has cooled, simply remove the basket and drawer, wash them with warm water and mild dish soap, rinse thoroughly, and allow them to dry completely before putting them back.
If your air fryer basket is dishwasher-safe, you can place it in the dishwasher according to the manufacturer’s instructions. However, hand washing with a soft sponge is often gentler on the nonstick coating and may help it last longer.
Making this quick cleanup part of your cooking routine is one of the easiest ways to keep your appliance in excellent condition.
Wipe the Interior Every Few Uses
While the basket gets most of the attention, the inside of the air fryer also collects grease over time.
Tiny droplets of oil can splash onto the interior walls during cooking, especially when preparing foods like chicken wings, bacon, sausages, or burgers. Although these splatters may not seem noticeable at first, they gradually create a sticky layer that attracts more grease and dust.
Every few uses, take a damp microfiber cloth or soft sponge and gently wipe the inside walls once the appliance has cooled completely.
Pay attention to:
- Interior walls
- Bottom of the cooking chamber
- Area beneath the basket
- Edges where grease tends to collect
Regularly wiping the interior keeps your air fryer looking clean while reducing the amount of grease that can eventually reach the heating element.
Check the Heating Element Weekly
Many people forget about the heating element because it isn’t immediately visible, yet it’s one of the most important parts of the appliance.
As hot air circulates, tiny grease droplets can settle on the heating element. If enough grease builds up, it may burn during cooking, causing smoke and unpleasant smells.
Once a week—or sooner if you use your air fryer every day—inspect the heating element after the appliance has completely cooled.
Look for:
- Grease spots
- Burnt food particles
- Dust buildup
- Food splatters
If needed, gently clean the heating element with a soft brush or a slightly damp cloth. Avoid soaking it or spraying water directly onto electrical components.
This small maintenance task can greatly improve cooking performance and reduce unwanted smoke.
Perform a Deep Clean Once a Month
Even if you clean the basket after every meal, your air fryer still benefits from a thorough monthly cleaning.
A deep clean removes grease hidden in areas that aren’t part of your daily routine, helping your appliance continue working efficiently.
A monthly deep clean air fryer routine should include:
- Washing the basket thoroughly
- Cleaning the drawer inside and out
- Wiping every interior surface
- Cleaning around the heating element
- Removing stubborn grease deposits
- Cleaning the exterior
- Checking air vents for dust and grease
- Drying every component completely before reassembly
If you use your air fryer several times each day, consider deep cleaning it every two weeks instead of monthly.
Clean Immediately After Cooking Greasy Foods
Some foods leave behind far more grease than others.
For example:
- Chicken wings
- Bacon
- Pork chops
- Hamburgers
- Sausages
- Duck
- Fatty cuts of steak
These foods release a significant amount of oil during cooking. If that grease sits overnight, it quickly hardens and becomes much harder to remove.
Whenever you prepare greasy meals, it’s best to clean the basket and wipe the interior as soon as the appliance has cooled.
Doing so prevents sticky residue from baking onto the surfaces and makes future cleaning much easier.
Clean More Often If You Cook Daily
Households that use their air fryer once or twice a week can usually follow the basic cleaning schedule without any issues.
However, if you rely on your air fryer every day, you’ll need a slightly more frequent maintenance routine.
Daily users should consider:
- Washing the basket after every meal
- Wiping the interior every one to three uses
- Inspecting the heating element weekly
- Deep cleaning every two to three weeks
Frequent cleaning prevents heavy grease buildup and helps maintain consistent cooking performance.
Signs Your Air Fryer Needs Immediate Cleaning
Sometimes your air fryer will let you know it needs attention before your scheduled cleaning day.
Watch for these warning signs:
- Smoke coming from the appliance during cooking
- A lingering burnt smell after use
- Sticky grease inside the basket
- Food sticking to the nonstick coating
- Uneven cooking results
- Excess crumbs in the drawer
- Visible grease on the heating element
- Strange odors when preheating
Ignoring these signs can make cleaning more difficult and may eventually affect how well your air fryer cooks.
A Simple Cleaning Routine Saves Time
Many people put off cleaning because they think it will take too long. In reality, spending just three to five minutes cleaning your air fryer after each use can save you from spending 30 minutes scrubbing hardened grease later.
A consistent routine keeps your appliance cleaner, reduces odors, prevents smoke, and helps preserve the nonstick coating for years of reliable cooking.
Now that you know how often you should clean an air fryer, the next step is gathering the right cleaning supplies before starting the cleaning process.
What You’ll Need Before Cleaning Your Air Fryer
Before you start cleaning, gather a few basic supplies. Using the right tools makes the job easier and helps protect your air fryer’s nonstick coating from scratches and damage.
The good news is that you probably already have everything you need at home. There’s no need for expensive cleaning products or harsh chemicals. In fact, mild cleaners are usually the safest and most effective option.
Here are the items you’ll want to have ready.
Warm Water
Warm water is one of the most effective tools for loosening grease and food residue.
After removing the basket and drawer, filling your sink with warm water and a little dish soap allows stuck-on food to soften naturally. This reduces the need for heavy scrubbing that could damage the nonstick surface.
Avoid using boiling water, especially if the basket has just come out of the air fryer. Sudden temperature changes may shorten the life of some nonstick coatings.
Mild Dish Soap
A few drops of mild dish soap are usually enough to remove everyday grease and cooking oils.
Choose a gentle soap designed for washing dishes. It cuts through grease without being too harsh on the appliance’s finish.
Avoid cleaners that contain bleach, ammonia, or strong solvents, as they may damage the basket, interior coating, or plastic components.
Soft Sponge or Non-Abrasive Cleaning Pad
A soft sponge is the safest choice for cleaning an air fryer.
It removes grease and food residue without scratching the nonstick coating. If food has become stuck to the basket, let it soak first instead of scrubbing aggressively.
Never use:
- Steel wool
- Scouring pads
- Wire brushes
- Metal scrapers
These can permanently damage the coating, making food stick more easily in the future.
Microfiber Cloth
A microfiber cloth is perfect for wiping down the inside and outside of your air fryer.
It lifts grease, absorbs moisture, and leaves surfaces clean without leaving lint behind.
Use it to clean:
- The cooking chamber
- Interior walls
- Exterior housing
- Control panel
- Handle
A slightly damp microfiber cloth is usually all you need for these areas.
Soft-Bristle Brush
Some food particles collect in corners or around the basket where a sponge can’t easily reach.
A soft-bristle brush helps remove crumbs and grease from these small spaces without damaging the appliance.
It’s also useful when performing a deep clean air fryer routine.
An Old Toothbrush
A clean, unused toothbrush is excellent for detailed cleaning.
Its small bristles can reach:
- Basket corners
- Air vents
- Small grooves
- Around the heating element
- Tight edges inside the drawer
Use gentle pressure to avoid scratching delicate surfaces.
Baking Soda
If your air fryer has stubborn grease or burnt food that won’t come off with soap alone, baking soda can help.
Mix a small amount with water to create a thick paste.
Apply it to greasy areas and let it sit for about 10 to 15 minutes before gently wiping it away with a soft sponge.
Baking soda is especially useful for:
- Removing baked-on grease
- Cleaning burnt food residue
- Eliminating stubborn stains
- Freshening the basket
It’s a simple household cleaner that’s safe when used correctly.
White Vinegar (Optional)
White vinegar can be helpful for removing lingering odors and cutting through light grease.
Mix equal parts white vinegar and warm water, dampen a microfiber cloth with the solution, and wipe the affected areas.
Avoid pouring vinegar directly into the appliance or soaking electrical parts.
While vinegar works well for odor removal, it isn’t always necessary for routine cleaning. Mild dish soap is enough for most everyday maintenance.
Paper Towels or a Dry Cloth
After washing the removable parts, dry them with a clean towel or allow them to air dry completely.
Moisture left behind can encourage unpleasant smells and may affect the appliance if parts are reassembled while still wet.
Taking a few extra minutes to dry everything thoroughly helps keep your air fryer in top condition.
Cleaning Products and Tools to Avoid
Knowing what not to use is just as important as choosing the right supplies.
Avoid these items when cleaning your air fryer:
- Steel wool
- Abrasive scouring pads
- Metal brushes
- Sharp knives or metal scrapers
- Oven cleaner
- Bleach
- Ammonia-based cleaners
- Harsh chemical degreasers
- Pressure washers or running water over the main unit
These products can scratch the nonstick coating, damage electrical components, or shorten the life of your appliance.
A Little Preparation Makes Cleaning Easier
Having the right cleaning supplies ready before you begin makes the entire process faster and more effective. In most cases, warm water, mild dish soap, a soft sponge, and a microfiber cloth are all you need to keep your air fryer clean.
For tougher jobs like removing grease from an air fryer or dealing with burnt-on food, baking soda and a soft brush can make the task much easier without risking damage to the appliance.
Now that your cleaning supplies are ready, it’s time to move on to the main part of this guide: how to clean an air fryer properly with a simple step-by-step process, including the basket, drawer, interior, heating element, and exterior.
Step-by-Step Guide: How to Clean an Air Fryer Properly
Now that you have your cleaning supplies ready, it’s time to clean your air fryer from top to bottom. Whether you’re doing a quick cleanup after dinner or a monthly deep clean, following these steps will help remove grease, food residue, and odors without damaging the appliance.
Take your time and avoid using excessive force. Most stubborn messes come off easily with soaking and gentle cleaning rather than aggressive scrubbing.
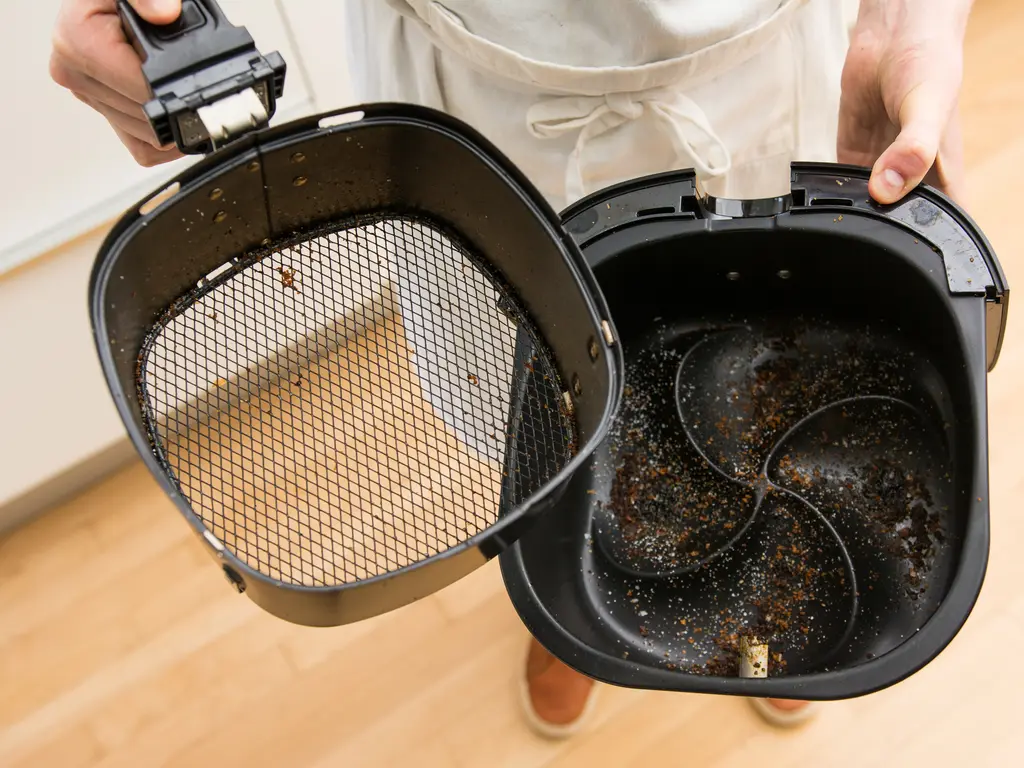
Step 1 – Unplug the Air Fryer and Let It Cool
Safety should always come first.
Before you begin cleaning, switch off the air fryer and unplug it from the power outlet. Never attempt to clean an appliance that is still connected to electricity.
Next, allow the air fryer to cool completely. Depending on what you’ve been cooking, this usually takes about 20 to 30 minutes.
Trying to wash hot components can cause several problems:
- You could burn your hands.
- Sudden temperature changes may damage the nonstick coating.
- Hot grease can splash during cleaning.
- Warm electrical components should never come into contact with water.
If you’re short on time, simply leave the basket slightly open after cooking. This helps heat escape more quickly while allowing the appliance to cool naturally.
Step 2 – Remove the Basket and Drawer
Once the air fryer has cooled, carefully remove the basket and drawer.
These parts collect most of the grease, oil, and food crumbs during cooking, making them the first areas that need attention.
Before washing, take a moment to inspect them.
Look for:
- Grease buildup
- Burnt food particles
- Sticky oil residue
- Crumbs trapped in the corners
- Food stuck inside the basket holes
If the basket contains a lot of grease, place it on paper towels first to absorb excess oil before washing.
For stubborn residue, don’t start scrubbing immediately. Soaking the basket in warm, soapy water for 10 to 15 minutes will loosen most food particles and make cleaning much easier.
Step 3 – Wash the Basket and Drawer
This is the most important part of how to clean an air fryer basket because it’s where most cooking residue collects.
Fill your sink or a large bowl with warm water and add a few drops of mild dish soap.
Place the basket and drawer in the water and allow them to soak if needed.
Using a soft sponge or non-abrasive cloth, gently clean every surface, paying close attention to:
- The cooking basket
- Basket holes
- Corners
- The inside of the drawer
- The underside of the basket
- Handles and edges
If grease remains after washing, use a soft-bristle brush or an old toothbrush to clean hard-to-reach areas.
Once everything is clean, rinse thoroughly with clean water to remove any soap residue.
Can You Put the Basket in the Dishwasher?
Many modern air fryers come with dishwasher-safe baskets and drawers.
If your manufacturer’s instructions confirm that these parts are dishwasher-safe, you can place them in the dishwasher for convenience.
However, hand washing is often the gentlest option. Over time, repeated dishwasher cycles may gradually wear down some nonstick coatings, especially if high heat or strong detergents are used.
When possible, hand washing with warm, soapy water is the safer long-term choice.
Step 4 – Remove Stubborn Grease
Sometimes a regular wash isn’t enough, especially after cooking greasy foods like bacon, chicken wings, burgers, or sausages.
If you’re dealing with sticky grease that won’t come off, don’t reach for harsh chemicals or metal scrubbers.
Instead, make a simple baking soda paste.
How to Make a Baking Soda Paste
Mix:
- 2 tablespoons of baking soda
- 1 tablespoon of water
Stir until it forms a thick paste.
Spread the paste over greasy areas and let it sit for about 10 to 15 minutes.
The baking soda helps loosen grease without scratching the nonstick coating.
After waiting, gently wipe the area with a soft sponge or microfiber cloth.
For especially stubborn spots, use a soft toothbrush to work the paste into small crevices.
Repeat the process if necessary.
This is one of the safest ways to remove grease from an air fryer without damaging its finish.
Step 5 – Wipe the Interior of the Air Fryer
Once the removable parts are clean, turn your attention to the inside of the air fryer.
Even though food doesn’t sit directly on the interior walls, grease and tiny oil droplets often collect there during cooking.
Using a damp microfiber cloth or soft sponge, gently wipe:
- The side walls
- The bottom of the cooking chamber
- Around the basket guides
- The back wall
- The ceiling beneath the heating element
You may notice a thin layer of grease that wasn’t visible before wiping.
If needed, dampen the cloth with warm, soapy water and continue cleaning until the surfaces feel smooth rather than sticky.
Never pour water directly into the main unit or submerge it in water.
Because the main body contains electrical components, it should only be cleaned with a lightly damp cloth.
Step 6 – Clean the Heating Element Carefully
The heating element is often overlooked, yet it’s one of the main reasons an air fryer begins producing smoke or burnt smells.
Grease splatters can collect on the heating element over time, especially if you frequently cook fatty foods.
To clean an air fryer heating element safely:
- Ensure the appliance is unplugged and completely cool.
- Remove the basket and drawer.
- Carefully turn the air fryer upside down if your model allows it.
- Use a soft microfiber cloth or a soft-bristle brush to gently remove grease and food particles.
- For stubborn residue, slightly dampen the cloth with warm water and wipe carefully.
Take care not to bend or press hard against the heating element. It is a delicate component, and rough handling can affect its performance.
Also, avoid spraying water or cleaning solutions directly onto the heating element or any electrical parts.
A quick inspection and light cleaning every week can help prevent smoke and improve cooking efficiency.
Step 7 – Clean the Exterior
The outside of your air fryer deserves attention too.
Fingerprints, grease splashes, and dust can build up on the housing, handle, and control panel over time.
Use a soft microfiber cloth dampened with warm water to wipe the exterior.
If needed, add a tiny amount of mild dish soap to remove greasy fingerprints.
Pay special attention to:
- The handle
- Control buttons
- Display panel
- Air vents
- The back of the appliance
Avoid allowing water to drip into the vents or electrical openings.
Keeping the exterior clean not only improves appearance but also prevents grease from accumulating around controls and ventilation areas.
Step 8 – Dry Every Part Completely
Before reassembling the air fryer, make sure every component is completely dry.
Moisture trapped inside the appliance can contribute to unpleasant odors and may affect electrical parts if water reaches areas where it shouldn’t.
Use a clean towel or allow the parts to air dry.
Be sure to dry:
- Basket
- Drawer
- Interior surfaces
- Exterior housing
- Heating element area (if wiped with a damp cloth)
Taking a little extra time here helps prevent future problems.
Step 9 – Reassemble and Check Your Work
Once everything is clean and dry, place the basket and drawer back into the air fryer.
Before storing or using it again, do a quick inspection.
Check that:
- No food particles remain.
- The basket slides in smoothly.
- The heating element is free of grease.
- There are no damp areas inside the appliance.
- The exterior is clean and dry.
Your air fryer is now ready for its next cooking session.
By following this step-by-step air fryer cleaning guide, you’ll keep your appliance cleaner, reduce smoke and odors, and help it cook food more evenly. More importantly, regular cleaning protects the nonstick coating and extends the life of your air fryer.
How to Remove Burnt Food from an Air Fryer
Even if you clean your air fryer regularly, burnt food can sometimes stick to the basket or drawer. Foods coated in sugary sauces, melted cheese, breadcrumbs, or marinades are especially likely to leave behind stubborn residue.
The key is to remove burnt food gently. Scraping with metal utensils or using abrasive cleaners may seem like a quick fix, but it can permanently damage the nonstick coating.
Here’s how to remove burnt food from an air fryer safely.
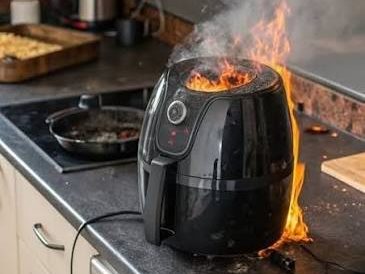
Soak the Basket First
If food is baked onto the basket, don’t start scrubbing right away.
Instead, fill your sink or a large bowl with warm water and add a few drops of mild dish soap. Place the basket and drawer in the water and let them soak for 15 to 20 minutes.
The warm, soapy water softens burnt food, making it much easier to remove without using excessive force.
For heavily burnt residue, you may need to soak the basket a little longer.
Patience often works better than aggressive scrubbing.
Use a Soft Sponge
After soaking, wipe the basket with a soft sponge or non-abrasive cleaning pad.
Most softened food particles should come away easily.
Work in gentle circular motions instead of pressing hard. This protects the nonstick coating while still removing stubborn residue.
Pay close attention to:
- Basket holes
- Corners
- Under the crisping tray (if your model has one)
- Edges where grease collects
If some burnt spots remain, move on to the baking soda method instead of reaching for a metal scraper.
Remove Stubborn Burnt Food with Baking Soda
Baking soda is one of the safest household cleaners for removing baked-on residue.
To make a cleaning paste:
- Mix 2 tablespoons of baking soda with 1 tablespoon of water.
- Stir until it forms a thick paste.
- Spread the paste over the burnt areas.
- Let it sit for 10 to 15 minutes.
Once the paste has had time to work, gently scrub the area using a soft sponge or an old toothbrush.
The mild abrasive action of baking soda helps lift burnt food without scratching the basket.
If needed, repeat the process until the residue is gone.
Clean Small Crevices with a Toothbrush
Burnt crumbs often become trapped in places a sponge can’t reach.
A soft toothbrush is perfect for cleaning:
- Basket holes
- Tight corners
- Small grooves
- Around the basket frame
Use light pressure and avoid forcing the bristles into the nonstick coating.
This simple step helps restore the basket to a much cleaner condition.
Wipe Away Burnt Residue Inside the Air Fryer
Burnt food doesn’t always stay in the basket.
Small crumbs and grease can stick to the interior walls or beneath the heating element during cooking.
After removing the basket, inspect the inside of the appliance.
Using a damp microfiber cloth, wipe away:
- Loose crumbs
- Burnt grease spots
- Food splatters
- Sticky residue
If necessary, use a small amount of warm, soapy water on the cloth.
Never pour water directly into the air fryer or immerse the main unit in water.
Check the Heating Element
Sometimes the smell of burnt food isn’t coming from the basket at all.
Grease and tiny food particles can collect on the heating element, where they burn every time the appliance heats up.
Once the air fryer has cooled completely:
- Remove the basket.
- Carefully inspect the heating element.
- Use a soft brush or microfiber cloth to remove any visible residue.
Cleaning this area regularly can eliminate lingering burnt smells and reduce smoke during cooking.
Avoid These Common Mistakes
When trying to remove burnt food, avoid shortcuts that could damage your appliance.
Never use:
- Steel wool
- Metal scouring pads
- Knives
- Forks
- Wire brushes
- Oven cleaner
- Bleach
- Abrasive powders
These products can scratch the nonstick coating, making food stick even more during future cooking.
Gentle cleaning may take a little longer, but it helps keep your air fryer in good condition.
Prevent Burnt Food from Sticking Again
Removing burnt residue is important, but preventing it in the first place is even better.
Here are a few simple habits that can help:
- Clean the basket after every use.
- Shake or flip food during cooking when recommended.
- Avoid overfilling the basket, which can lead to uneven cooking.
- Use the correct temperature for the food you’re preparing.
- Wipe away grease before it hardens.
- Empty loose crumbs after each cooking session.
These small steps reduce the chances of stubborn burnt residue building up over time.
Burnt Food Doesn’t Have to Ruin Your Air Fryer
Burnt food is a normal part of cooking from time to time, especially when experimenting with new recipes or cooking foods that contain sugary glazes. Fortunately, most burnt residue can be removed with warm, soapy water, a baking soda paste, and a little patience.
Avoid harsh scrubbing and give stubborn spots time to soften before cleaning. This approach protects the nonstick coating while keeping your air fryer looking and performing like new.
How to Remove Grease Buildup from an Air Fryer
Grease buildup is one of the most common cleaning challenges for air fryer owners. While a small amount of oil is normal during cooking, repeated use without proper cleaning can leave behind a thick, sticky layer that’s harder to remove over time.
Foods like bacon, chicken wings, burgers, sausages, and other fatty meats release a lot of grease as they cook. If that grease isn’t cleaned away after each use, it can bake onto the basket, drawer, interior walls, and even the heating element.
The good news is that you don’t need harsh chemicals to remove it. With the right approach, you can safely remove grease from an air fryer and keep it performing like new.
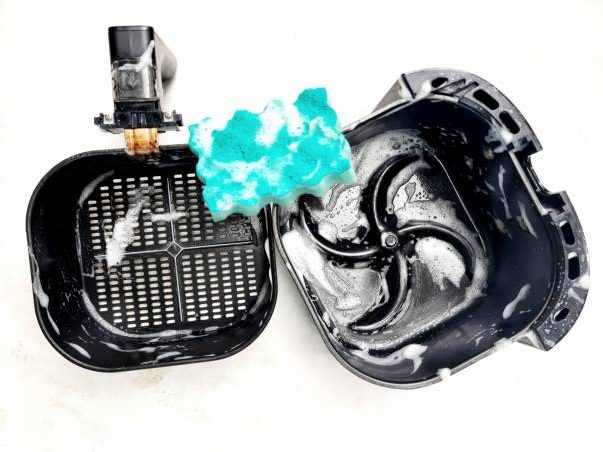
Don’t Let Grease Sit for Too Long
Fresh grease is much easier to clean than grease that has been left to harden.
After cooking, allow the air fryer to cool completely, then remove the basket and drawer as soon as it’s safe to handle them. Washing these parts the same day prevents grease from drying into a sticky coating.
If you regularly postpone cleaning, grease can build up layer by layer, making future cleanups more time-consuming.
A quick wash after each use is the simplest way to avoid this problem.
Soak Greasy Parts in Warm, Soapy Water
If the basket or drawer feels sticky, start by soaking both parts in warm water mixed with a few drops of mild dish soap.
Let them soak for about 15 to 20 minutes.
This gives the soap time to break down grease, making it easier to wipe away without heavy scrubbing.
After soaking, clean the surfaces with a soft sponge, paying extra attention to:
- Basket holes
- Corners
- The underside of the basket
- The inside of the drawer
- Edges where grease tends to collect
Rinse thoroughly and inspect the surfaces before moving on.
Use Baking Soda for Stubborn Grease
Some grease deposits may remain even after soaking.
For these tougher spots, baking soda works well because it helps lift grease without damaging the nonstick coating.
Mix:
- 2 tablespoons of baking soda
- 1 tablespoon of water
Spread the paste over greasy areas and leave it for 10 to 15 minutes.
Once the grease has softened, gently wipe it away using a soft sponge or microfiber cloth.
If necessary, repeat the process instead of scrubbing harder.
Taking your time protects the basket while producing better results.
Clean the Interior Walls
Many people focus only on the basket, but grease also collects inside the cooking chamber.
Oil droplets carried by hot air settle on the interior walls during cooking. Over time, these droplets become sticky and attract even more grease and dust.
Use a damp microfiber cloth with a small amount of mild dish soap to wipe:
- Side walls
- Bottom of the cooking chamber
- Basket rails
- Rear interior wall
Continue wiping until the surfaces no longer feel sticky.
Never pour water directly into the appliance, and never immerse the main unit in water.
Don’t Forget the Heating Element
The heating element is another area where grease can quietly build up.
When grease lands on the heating element, it burns during cooking, creating smoke and unpleasant odors.
After unplugging the appliance and allowing it to cool completely:
- Remove the basket.
- Carefully inspect the heating element.
- Use a soft-bristle brush or a microfiber cloth to remove grease.
- Wipe gently without applying pressure.
Cleaning this area regularly can improve cooking performance and reduce the chances of smoke during future use.
Wipe the Exterior Too
Grease doesn’t always stay inside the air fryer.
Steam and cooking oils can leave fingerprints and light grease on the handle, buttons, and outer housing.
Use a damp microfiber cloth to wipe the exterior, then dry it with a clean towel.
Keeping the outside clean helps your appliance look as good as it performs.
Natural Ways to Cut Through Grease
If you’re looking for a simple household solution, white vinegar can help loosen light grease.
Mix equal parts warm water and white vinegar, dampen a microfiber cloth with the solution, and wipe greasy areas.
You can also use vinegar after washing to help remove lingering cooking odors.
Keep in mind that vinegar works best on light grease. For heavy buildup, baking soda and dish soap are usually more effective.
Prevent Grease from Building Up Again
Removing grease is important, but preventing future buildup saves even more time.
Here are a few simple habits that make a big difference:
- Wash the basket and drawer after every use.
- Empty grease from the drawer once it has cooled.
- Wipe the interior every few cooking sessions.
- Inspect the heating element weekly.
- Deep clean your air fryer once a month or more often if you cook daily.
- Avoid leaving greasy residue inside overnight.
These habits take only a few minutes but can greatly reduce the amount of scrubbing needed later.
When Is It Time for a Deep Clean?
Sometimes a quick wipe isn’t enough.
Consider giving your air fryer a full deep clean if you notice:
- Thick, sticky grease that doesn’t wipe away easily
- Smoke during cooking
- Strong odors that remain after washing
- Grease on the heating element
- Food sticking more than usual
- Visible grease inside the cooking chamber
A thorough air fryer cleaning guide routine once a month helps prevent these issues from becoming bigger problems.
A Clean Air Fryer Performs Better
Grease buildup doesn’t just make your air fryer look dirty—it can also affect airflow, cooking performance, and even the taste of your food. Fortunately, regular cleaning with warm, soapy water, a soft sponge, and baking soda for stubborn spots is usually all it takes to keep grease under control.
By cleaning your air fryer consistently, you’ll spend less time dealing with sticky residue and more time enjoying evenly cooked meals.
In the next section, we’ll look at how to remove bad odors from an air fryer, including simple methods for getting rid of lingering smells caused by grease, burnt food, and strongly seasoned dishes.
How to Remove Bad Odors from an Air Fryer
If your air fryer smells unpleasant even after you’ve washed the basket, you’re not alone. Strong odors are a common issue, especially if you regularly cook foods like fish, bacon, garlic, onions, or heavily seasoned meats.
A lingering smell doesn’t necessarily mean there’s something wrong with your appliance. In most cases, odors come from grease, burnt food particles, or residue hidden in areas that are easy to overlook.
The good news is that you can usually remove odor from an air fryer with a few simple cleaning methods and some regular maintenance.
Find the Source of the Odor
Before trying to eliminate the smell, it’s helpful to identify where it’s coming from.
Check these areas carefully:
- The basket
- The drawer
- The interior walls
- The heating element
- Under the crisping tray (if your model has one)
- Air vents
- Around the basket rails
Grease or burnt crumbs trapped in any of these places can continue producing odors every time the air fryer heats up.
Once you’ve identified the problem area, it’s much easier to remove the smell completely.
Wash the Basket and Drawer Thoroughly
Start with the parts that come into direct contact with food.
Wash the basket and drawer using:
- Warm water
- Mild dish soap
- A soft sponge
If grease has hardened, soak the parts for 15 to 20 minutes before cleaning.
Pay extra attention to corners, basket holes, and the underside of the basket, as these areas often trap grease that causes lingering odors.
Rinse thoroughly to remove all traces of soap before drying.
Clean the Interior of the Air Fryer
Even if the basket is spotless, grease inside the cooking chamber can still create unpleasant smells.
Use a damp microfiber cloth with a small amount of mild dish soap to wipe:
- Side walls
- Bottom of the cooking chamber
- Rear wall
- Basket supports
- Ceiling beneath the heating element
Removing this thin layer of grease often makes a noticeable difference.
Avoid pouring water directly into the appliance, and never immerse the main unit in water.
Clean the Heating Element
One of the most overlooked causes of bad smells is a dirty heating element.
Tiny grease droplets can land on the element during cooking. Every time the air fryer heats up, those deposits burn again, creating smoke and unpleasant odors.
Once the appliance has cooled completely:
- Remove the basket.
- Carefully inspect the heating element.
- Use a soft brush or microfiber cloth to remove grease and food particles.
Regularly cleaning the heating element can prevent recurring smells and improve cooking performance.
Use White Vinegar to Freshen the Air Fryer
White vinegar is a simple household cleaner that helps neutralize odors.
Mix equal parts:
- White vinegar
- Warm water
Dampen a microfiber cloth with the solution and wipe the basket, drawer, and interior surfaces.
After wiping, go over everything again with a clean cloth dampened with plain water to remove any vinegar residue.
Leave the air fryer open for a while so it can air dry completely.
Although vinegar has a strong smell at first, it fades quickly and often takes lingering cooking odors with it.
Try Baking Soda for Stubborn Smells
Baking soda is well known for absorbing odors, making it another effective option.
After cleaning the appliance:
- Sprinkle a small amount of baking soda into the dry basket.
- Leave it overnight.
- Discard the baking soda the next day.
- Wipe the basket with a clean, damp cloth before using the air fryer again.
This method works especially well for stubborn smells that remain after cooking fish or spicy foods.
Let the Air Fryer Dry Completely
Moisture trapped inside the appliance can contribute to musty odors over time.
After cleaning, dry every part thoroughly with a clean towel or allow the components to air dry before putting them back together.
Leaving the basket slightly open while the appliance dries also improves airflow and helps prevent lingering moisture.
Avoid Covering Up Odors
It may be tempting to use strongly scented cleaners to mask bad smells, but this isn’t a good idea.
Fragranced cleaners can leave behind residues that may affect the taste of your food the next time you cook.
Stick to:
- Mild dish soap
- Warm water
- Baking soda
- White vinegar
These cleaning methods remove the cause of the odor instead of simply hiding it.
Prevent Odors Before They Start
Keeping bad smells away is much easier than removing them once they’ve settled into grease and food residue.
Here are a few habits that help:
- Wash the basket and drawer after every use.
- Wipe the interior regularly.
- Clean the heating element every week or two, depending on how often you cook.
- Empty crumbs from the drawer after each meal.
- Avoid leaving cooked food sitting inside the air fryer for long periods.
- Perform a deep clean at least once a month.
These simple routines help keep your appliance smelling fresh and ready for your next meal.
When Should You Be Concerned About a Bad Smell?
Most cooking odors disappear after a proper cleaning. However, if your air fryer continues to produce a strong burning smell even when it’s clean, take a closer look.
Check for:
- Grease on the heating element
- Plastic packaging that may not have been removed
- Food trapped near the fan or vents
- Damage to the nonstick coating
- Signs of overheating, such as melted plastic or discoloration
If you notice smoke, electrical burning smells, or visible damage, stop using the appliance until you’ve identified the cause or had it inspected.
Fresh Air Fryer, Better-Tasting Food
A clean, odor-free air fryer makes every meal more enjoyable. By removing grease, burnt food, and hidden residue, you can eliminate most unwanted smells without using harsh chemicals.
Regular cleaning not only keeps your kitchen smelling fresher but also helps your air fryer cook food more evenly and prevents yesterday’s meal from affecting today’s.
Common Air Fryer Cleaning Mistakes to Avoid
Cleaning your air fryer doesn’t have to be difficult, but using the wrong methods can do more harm than good. Many air fryers have a durable nonstick coating and sensitive electrical components that require a little extra care.
Avoiding these common mistakes will help protect your appliance, improve its performance, and extend its lifespan.
1. Cleaning the Air Fryer While It’s Still Hot
It’s understandable to want to clean up immediately after cooking, but washing a hot air fryer isn’t a good idea.
The basket, drawer, and heating element can remain extremely hot for several minutes after use. Cleaning too soon increases the risk of burns and may also expose hot nonstick surfaces to sudden temperature changes.
Always:
- Turn off the air fryer.
- Unplug it from the power outlet.
- Allow it to cool completely before cleaning.
Waiting 20 to 30 minutes is usually enough.
2. Using Steel Wool or Metal Scrubbers
One of the fastest ways to ruin an air fryer basket is by using abrasive cleaning tools.
Avoid using:
- Steel wool
- Wire brushes
- Metal scouring pads
- Knives
- Forks
- Metal spatulas for scraping
These items can scratch the nonstick coating, causing food to stick more easily and making future cleaning even harder.
Instead, use a soft sponge, microfiber cloth, or soft-bristle brush.
3. Using Harsh Chemical Cleaners
Strong cleaning products may remove grease quickly, but they can also damage your air fryer.
Avoid products such as:
- Oven cleaner
- Bleach
- Ammonia
- Industrial degreasers
- Abrasive cleaning powders
These chemicals can wear down protective coatings, discolor plastic parts, and leave behind residues that you don’t want near your food.
For most cleaning jobs, warm water, mild dish soap, baking soda, and white vinegar are more than enough.
4. Forgetting to Clean the Heating Element
Many people only wash the basket and assume the job is done.
However, grease often collects on the heating element during cooking. Over time, that grease burns whenever the air fryer heats up, leading to:
- Smoke
- Burning smells
- Reduced heating efficiency
Check the heating element regularly and clean it gently with a soft cloth or brush once the appliance has cooled.
It’s a simple step that many owners overlook.
5. Ignoring the Interior Walls
The inside of the cooking chamber can collect a surprising amount of grease.
If you never wipe the interior, sticky residue gradually builds up, attracting more grease and food particles.
Every few uses, wipe the interior walls with a damp microfiber cloth to keep the appliance clean and reduce odors.
6. Letting Grease Build Up
One of the biggest mistakes is waiting until the basket is covered in thick grease before cleaning it.
Fresh grease comes off easily.
Old grease hardens into a sticky layer that takes much more effort to remove.
Cleaning the basket after every use is the easiest way to avoid heavy buildup and reduce the need for frequent deep cleaning.
7. Reassembling the Air Fryer While It’s Still Wet
After washing, it’s tempting to put everything back together right away.
However, moisture trapped inside the basket or drawer can contribute to unpleasant odors and may eventually affect the appliance if water reaches electrical areas.
Before reassembling:
- Dry the basket thoroughly.
- Dry the drawer.
- Wipe the interior.
- Allow all parts to air dry if necessary.
A completely dry air fryer is always the safer choice.
8. Immersing the Main Unit in Water
The basket and drawer are removable because they’re designed to be washed.
The main air fryer unit is different.
Since it contains electrical components, the main housing should never be:
- Placed in a sink
- Rinsed under a tap
- Submerged in water
- Washed in a dishwasher
Instead, clean it with a soft, damp cloth.
9. Skipping Regular Deep Cleaning
Even if you wash the basket after every meal, grease can still collect inside the appliance over time.
A monthly deep clean helps remove hidden grease from:
- Interior walls
- Heating element
- Basket rails
- Air vents
- Exterior surfaces
Skipping this maintenance can eventually lead to smoke, odors, and uneven cooking.
10. Overlooking the Manufacturer’s Instructions
Although most air fryers are cleaned in a similar way, there can be small differences between models.
Some baskets are dishwasher-safe, while others should only be hand washed. Certain models also have removable crisping plates or additional accessories that require specific care.
Before using a new cleaning product or placing parts in the dishwasher, check your user manual for any model-specific recommendations.
Following the manufacturer’s instructions helps protect your warranty and ensures you’re cleaning the appliance correctly.
Quick Tips to Avoid Cleaning Problems
Keep these simple reminders in mind:
- Clean the basket after every use.
- Wipe the interior regularly.
- Inspect the heating element weekly.
- Use only soft cleaning tools.
- Avoid harsh chemicals.
- Dry every part completely before reassembly.
- Perform a deep clean at least once a month.
- Never immerse the main unit in water.
These habits make cleaning easier and help your air fryer stay in excellent condition.
A Few Good Habits Go a Long Way
Most air fryer cleaning problems are easy to avoid with a consistent routine. Gentle cleaning, the right tools, and regular maintenance are all it takes to keep your appliance working efficiently.
By avoiding these common mistakes, you’ll protect the nonstick coating, reduce smoke and odors, and enjoy better cooking results for years to come.
Air Fryer Maintenance Tips to Keep It Working Like New
Cleaning your air fryer is one of the best ways to care for it, but good maintenance goes beyond washing the basket. A few simple habits can help your appliance cook more evenly, reduce wear and tear, and last for many years.
Whether you use your air fryer every day or only on weekends, these air fryer maintenance tips will help keep it performing at its best.
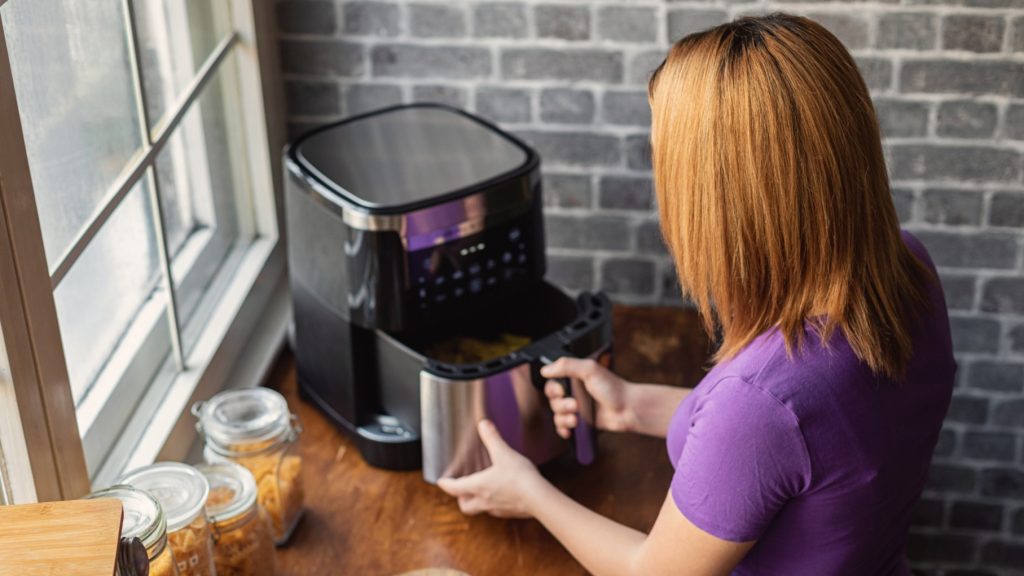
Clean the Air Fryer After Every Use
The easiest way to keep your air fryer in excellent condition is to clean it after every meal.
You don’t need to perform a deep clean each time. Simply:
- Wash the basket and drawer.
- Empty any loose crumbs.
- Wipe away grease.
- Dry everything before storing the appliance.
This quick routine prevents grease from hardening and keeps cleaning simple.
Deep Clean It Regularly
Daily cleaning removes surface grease, but a monthly deep clean helps remove buildup that isn’t always visible.
A proper deep clean should include:
- Washing the basket and drawer thoroughly
- Wiping the interior walls
- Cleaning the heating element
- Cleaning the air vents
- Wiping the exterior
- Inspecting for hidden grease deposits
If you cook with your air fryer every day, consider deep cleaning it every two to three weeks instead of once a month.
Avoid Using Cooking Spray on the Basket
Many people spray cooking oil directly onto the nonstick basket, but this can gradually damage the coating.
Some aerosol cooking sprays contain additives that leave behind a sticky residue that’s difficult to remove.
Instead:
- Lightly coat your food with oil.
- Use an oil mister designed for cooking.
- Brush a small amount of oil onto food before placing it in the basket.
This helps protect the nonstick surface while still achieving crispy results.
Don’t Overfill the Basket
It’s tempting to cook as much food as possible in one batch, but overcrowding the basket can reduce airflow.
When hot air can’t circulate properly:
- Food cooks unevenly.
- Cooking times increase.
- More grease collects in certain areas.
- Cleaning becomes more difficult.
For the best results, leave enough space around your food so hot air can move freely.
If you’re cooking a large meal, prepare it in batches instead.
Shake or Turn Food During Cooking
Many foods cook more evenly when they’re shaken or flipped halfway through the cooking time.
This simple habit helps:
- Improve browning
- Prevent food from sticking
- Reduce burnt spots
- Allow grease to drip away more evenly
Not every recipe requires this step, but it’s especially useful for fries, vegetables, and bite-sized foods.
Empty Grease from the Drawer
After cooking fatty foods like bacon or chicken wings, you’ll often find grease collected in the bottom of the drawer.
Once the appliance has cooled, pour the grease into a suitable container before washing the drawer.
Leaving grease sitting inside the air fryer for long periods can lead to unpleasant odors and make cleaning much harder.
Check the Heating Element Regularly
The heating element is one of the hardest-working parts of your air fryer.
Every week or two, depending on how often you cook, inspect it for:
- Grease splatters
- Burnt food particles
- Dust buildup
If needed, gently wipe it with a soft microfiber cloth or use a soft brush.
Keeping the heating element clean helps maintain consistent cooking temperatures and reduces the chance of smoke.
Keep the Air Vents Clear
Air fryers rely on proper airflow to cook food efficiently.
Dust, grease, or other debris around the air vents can reduce airflow and affect performance.
Occasionally inspect the vents on the back or sides of the appliance and wipe them with a dry or slightly damp cloth if necessary.
Never block the vents while the air fryer is in use.
Store Your Air Fryer Properly
When you’re finished cleaning, store your air fryer in a cool, dry place.
If you keep it on the countertop, make sure it’s protected from excessive moisture and grease from nearby cooking.
If you store it in a cupboard:
- Ensure it’s completely dry first.
- Avoid placing heavy items on top of it.
- Store the power cord neatly without wrapping it tightly around the appliance.
Proper storage helps prevent accidental damage and keeps the appliance ready for its next use.
Inspect the Power Cord
Before using your air fryer, take a quick look at the power cord.
Check for:
- Cracks
- Fraying
- Loose connections
- Signs of heat damage
If the cord appears damaged, stop using the appliance until it has been repaired or replaced according to the manufacturer’s recommendations.
A damaged power cord is both a safety hazard and a sign that the appliance needs attention.
Use the Right Utensils
Metal utensils can scratch the nonstick coating inside the basket.
Instead, choose utensils made from:
- Silicone
- Wood
- Heat-resistant plastic
These materials help preserve the coating and reduce the risk of accidental damage while serving food.
Follow the Manufacturer’s Capacity Guidelines
Every air fryer has a recommended cooking capacity.
Consistently exceeding that limit can:
- Reduce cooking performance
- Put extra strain on the fan and heating system
- Increase grease buildup
- Shorten the appliance’s lifespan
Cooking within the recommended capacity produces better results and helps your air fryer last longer.
Quick Air Fryer Maintenance Checklist
Use this simple checklist to keep your appliance in great shape:
✓ Wash the basket and drawer after every use.
✓ Wipe the interior every few cooking sessions.
✓ Clean the heating element regularly.
✓ Remove grease before it hardens.
✓ Deep clean the air fryer at least once a month.
✓ Keep the air vents clean and unobstructed.
✓ Dry all parts completely before reassembling.
✓ Avoid harsh cleaners and abrasive scrubbers.
✓ Use silicone or wooden utensils instead of metal.
✓ Store the appliance in a clean, dry place.
Frequently Asked Questions
Can you wash an air fryer basket in a dishwasher?
Yes, if the manufacturer says it’s dishwasher-safe. Hand washing is still gentler.
Why does my air fryer smell even after cleaning?
Grease may be stuck near the heating element. A deep clean usually fixes air fryer odor issues.
Can vinegar or baking soda be used?
They can help with odor removal, but use them lightly and rinse well.
Is it safe to clean an air fryer with water?
Only removable parts should be washed with water. Never submerge the main unit.
Conclusion
Knowing how to clean an air fryer properly is one of the easiest ways to protect your appliance and keep it cooking at its best. A few minutes of cleaning after each use can prevent grease buildup, eliminate unpleasant odors, reduce smoke, and help your meals taste fresh every time.
By following this step-by-step air fryer cleaning guide, you’ll know how to clean the basket, drawer, interior, heating element, and exterior safely without damaging the nonstick coating. Pair that with a regular maintenance routine, and your air fryer will continue delivering reliable performance for years.
Remember, the best way to avoid stubborn grease and burnt food is to clean your air fryer consistently rather than waiting until buildup becomes difficult to remove. With the right cleaning supplies, gentle techniques, and a little routine maintenance, keeping your air fryer spotless becomes a quick and simple task instead of a major chore.
Whether you use your air fryer occasionally or every day, these cleaning and maintenance habits will help you enjoy better cooking results, extend the life of your appliance, and make every meal a little more enjoyable.