
Knowing the right air fryer cooking times and temperatures can make a big difference between food that is perfectly crisp and food that is either undercooked, dry, or burnt.
One of the biggest advantages of an air fryer is how quickly it can cook food. However, that speed also means that a few extra minutes can make a noticeable difference. A batch of French fries might go from pale and soft to golden and crispy in just a few minutes, while a chicken breast can become dry if it is left cooking too long.
The challenge is that there is no single cooking time that works for every air fryer or every kitchen. The size and thickness of your food, how much you put in the basket, whether it is fresh or frozen, and the design of your air fryer can all affect the final result.
That’s why this guide is designed as more than a simple list of cooking times. It explains what temperature to use, approximately how long different foods take, when to shake or flip them, and what to look for when they are done.
Use the cooking times in this guide as a reliable starting point rather than an absolute rule. Once you learn how your particular air fryer behaves, you can make small adjustments to get the texture and doneness you prefer.
Important: Cooking time is only a guide. For meat, poultry, and other foods where food safety matters, use a food thermometer and check the internal temperature rather than relying on appearance or the timer alone.
Air Fryer Cooking Times & Temperature Chart
If you’re looking for a quick answer, this air fryer cooking chart is the best place to start.
The times below are general starting ranges for a typical basket-style air fryer. They assume the food is arranged in a reasonably even layer and that the basket isn’t excessively crowded.
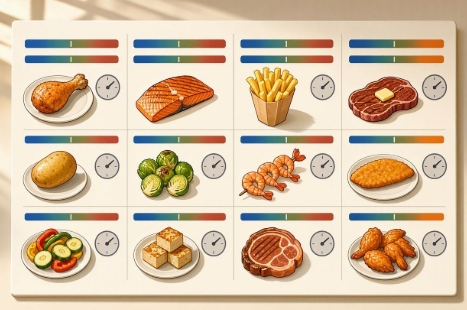
| Food | Temperature | Approx. Cooking Time | Shake/Flip? |
|---|---|---|---|
| Chicken breast | 375°F | 18–22 minutes | Flip halfway |
| Chicken wings | 400°F | 20–25 minutes | Shake/flip |
| Chicken thighs | 380°F | 20–25 minutes | Flip |
| Chicken tenders | 375°F | 12–16 minutes | Flip |
| Chicken nuggets | 400°F | 8–12 minutes | Shake |
| Steak | 400°F | 8–14 minutes | Flip |
| Beef burgers | 375–400°F | 10–15 minutes | Flip |
| Pork chops | 380°F | 12–18 minutes | Flip |
| Salmon | 390°F | 8–12 minutes | Usually no |
| Shrimp | 400°F | 6–10 minutes | Shake |
| Broccoli | 375°F | 8–12 minutes | Shake |
| Brussels sprouts | 375°F | 12–16 minutes | Shake |
| Asparagus | 375°F | 6–10 minutes | Shake |
| Carrots | 375°F | 12–18 minutes | Shake |
| Frozen French fries | 400°F | 15–20 minutes | Shake |
| Fresh-cut fries | 380–400°F | 18–25 minutes | Shake |
| Potato wedges | 400°F | 18–25 minutes | Shake |
| Tater tots | 400°F | 12–18 minutes | Shake |
| Bacon | 350°F | 7–10 minutes | Optional |
| Sausage | 375°F | 10–15 minutes | Turn |
| Onion rings | 400°F | 8–12 minutes | Shake |
| Mozzarella sticks | 375°F | 6–8 minutes | Optional |
| Pizza | 350°F | 3–6 minutes | No |
| Garlic bread | 350°F | 4–7 minutes | No |
How to Use This Air Fryer Time and Temperature Chart
Don’t treat the chart as a strict recipe where the timer automatically tells you when to stop cooking. Instead, think of each time range as a starting point.
For example, suppose you’re cooking chicken breast at 375°F. A small, thin breast may be ready toward the lower end of the range, while a large, thick breast could require more time. If you simply set the air fryer for 22 minutes without checking the chicken, you could end up overcooking a smaller piece.
The same principle applies to frozen French fries. A lightly filled basket may become crispy in 15 minutes, while a larger batch may need closer to 20 minutes. Shaking the basket during cooking can also make a noticeable difference because it exposes more of the fries to the circulating hot air.
For this reason, start checking food near the lower end of the recommended range. If it isn’t ready, continue cooking for a few more minutes and check again.
This simple habit gives you much more control over the final result.
Why Air Fryer Cooking Times Are Not the Same for Every Food
It’s tempting to think that setting an air fryer to 400°F means every food will cook according to a fixed timetable. In reality, cooking is affected by several variables.
The most important ones are food size, thickness, moisture, starting temperature, quantity, and airflow.
Consider two chicken breasts that weigh the same. One may be long and thin while the other is thick through the center. Even though their weights are similar, the thicker piece will usually take longer for heat to reach the middle.
The same thing happens with vegetables. A carrot cut into thin sticks can become tender relatively quickly, while large chunks of carrot need considerably more time.
Frozen food introduces another variable. A frozen chicken nugget and a frozen chicken breast are both frozen, but their sizes are completely different. The nugget can heat through quickly, while the larger piece requires much more time.
This is why a good air fryer cooking guide should provide ranges and explain how to adjust them instead of pretending that one exact number works in every situation.
Air Fryer Temperature Guide: Understanding the Main Temperature Ranges
The temperature you choose affects more than simply how quickly food cooks. It also influences browning, crispiness, moisture loss, and how evenly the center cooks.
Understanding the basic temperature ranges makes it easier to choose a suitable setting even when you’re cooking something that isn’t listed in a chart.
300°F–325°F: Lower-Temperature Cooking
Temperatures around 300°F to 325°F are useful when you want to warm or cook food more gently.
This range can work well for:
- Reheating bread
- Warming pastries
- Reheating delicate leftovers
- Some baked foods
- Gently warming food without excessive browning
For example, reheating a slice of pizza at a very high temperature can make the crust hard before the cheese and toppings have warmed properly. A moderate temperature gives the heat more time to move through the food.
Lower temperatures are also useful when the outside of a food tends to brown too quickly.
350°F–375°F: The Everyday Cooking Range
For many everyday foods, 350°F to 375°F is a practical range.
You can use it for foods such as:
- Chicken breast
- Chicken thighs
- Pork chops
- Fish
- Vegetables
- Sausages
- Bacon
- Reheating leftovers
For example, chicken breast cooked at 375°F can brown nicely without exposing the outside to the extremely high heat used for foods such as French fries.
This range is also useful when you’re still learning your air fryer because it gives you a little more room to adjust cooking time without the outside becoming overly dark too quickly.
380°F–400°F: High-Heat Cooking
The upper end of the temperature range is particularly useful when you want browning and crispiness.
Foods commonly cooked around 380°F to 400°F include:
- French fries
- Chicken wings
- Tater tots
- Onion rings
- Frozen snacks
- Some vegetables
- Steak
For example, frozen French fries often benefit from 400°F because the higher heat helps remove surface moisture and brown the outside.
However, higher temperatures aren’t automatically better.
If you put a thick piece of chicken into a very hot air fryer, the outside can become deeply browned before the center has reached a safe temperature. In situations like this, using a slightly lower temperature for a longer period can produce a better result.
A Simple Rule for Choosing an Air Fryer Temperature
If you don’t know what temperature to use, think about the result you’re trying to achieve.
Want gentle reheating? Start around 300°F–325°F.
Want everyday cooking and moderate browning? Try 350°F–375°F.
Want strong browning and crispiness? Consider 380°F–400°F.
Then consider the food itself. A delicate fish fillet and a batch of frozen fries don’t need the same treatment.
This approach is more useful than memorizing one temperature because it helps you understand why a particular temperature works.
How Air Circulation Affects Cooking Time
An air fryer works by circulating hot air around the food. That airflow is one of the main reasons an air fryer can brown and crisp food so effectively.
But airflow only works properly when there is enough space around the food.
Imagine placing ten French fries in the basket with plenty of room between them. Hot air can reach almost every surface.
Now imagine filling the basket until the fries are piled on top of each other. The hot air has fewer paths through the food, so some fries may brown while others remain soft.
This is why basket overcrowding can increase cooking time and reduce crispiness.
If you have a large amount of food, cooking in two batches can sometimes give you a much better result than trying to fit everything into the basket at once.
Should You Preheat Your Air Fryer?
Preheating can be helpful, but it isn’t necessary for every food.
When an air fryer is already hot when the food goes inside, cooking begins immediately at the target temperature. This can be particularly useful for foods where you want quick browning or crisping.
For example, preheating may help when cooking:
- French fries
- Chicken wings
- Steak
- Some frozen snacks
- Certain baked foods
However, you don’t necessarily need to preheat for every reheating task.
The important thing is to understand how your particular appliance works. Some air fryers heat up very quickly, while others have a longer preheat cycle.
If your manufacturer’s instructions specify preheating for a particular function, follow those instructions.
Why You Shouldn’t Rely on Cooking Time Alone
One of the most important lessons in any air fryer temperature guide is that the timer doesn’t actually measure doneness.
The timer only tells you how long the appliance has been operating.
It doesn’t know whether your chicken breast is thick or thin. It doesn’t know whether you placed two pieces in the basket or six. It doesn’t know whether the food started frozen or refrigerated.
For foods where internal temperature matters, a thermometer gives you much more reliable information.
For example, if two chicken breasts are both cooked at 375°F, one may be ready after 18 minutes while the other requires additional time because it is thicker.
Instead of asking, “Has the timer finished?”
Ask:
“Has the food reached the appropriate internal temperature and texture?”
That small change in thinking can dramatically improve your air-fryer results.
Air Fryer Chicken Cooking Times
Chicken is one of the best foods to cook in an air fryer, but it is also one of the foods where size, thickness, and preparation make the biggest difference.
A small chicken tender and a thick bone-in chicken thigh obviously won’t need the same cooking time. Even two chicken breasts that look similar can finish at different times if one is considerably thicker through the center.
For that reason, the times below should be treated as practical starting points. Begin checking the chicken toward the lower end of the suggested range, and use an instant-read thermometer to confirm that it has reached a safe internal temperature.
Another important point is to avoid filling the basket too tightly. Chicken pieces need room around them so the hot air can circulate. If you pack them together, the surface may not brown properly and the cooking time can increase.
Air Fryer Chicken Breast Cooking Time
Temperature: 375°F
Cooking time: Approximately 18–22 minutes
Chicken breast is lean, so it can become dry when overcooked. The goal is to cook the center thoroughly while retaining as much moisture as possible.
Before cooking, pat the chicken dry and season it as desired. If the breast is particularly thick, consider gently flattening the thickest part so that the meat has a more even thickness from one end to the other.
Place the chicken in the basket with space between the pieces. Cook at 375°F and turn the breast approximately halfway through if your air fryer tends to brown one side more than the other.
Start checking the chicken around the 18-minute mark rather than automatically leaving it for the full 22 minutes.
How to Tell When Chicken Breast Is Done
The most reliable method is to check the thickest part with a food thermometer.
Do not judge doneness only by the outside color. Chicken can become nicely browned while the center still needs additional cooking.
If you regularly cook chicken in your air fryer, an inexpensive instant-read thermometer is one of the most useful accessories you can own.
Air Fryer Chicken Thighs
Temperature: 380°F
Cooking time: Approximately 20–25 minutes
Chicken thighs contain more fat than chicken breast, which makes them more forgiving when exposed to heat.
Both boneless and bone-in thighs can be cooked in an air fryer, but their cooking times won’t necessarily be identical.
Boneless thighs are usually quicker because there is no bone affecting the way heat moves through the meat.
Bone-in thighs are thicker and generally require more time.
For skin-on thighs, place them in a position where the skin can receive plenty of circulating air. This helps the skin brown and become crisp.
Turn the thighs halfway through cooking if necessary, particularly if your air fryer has an uneven heating pattern.
A Common Chicken Thigh Mistake
One mistake is judging thighs only by how brown they look.
The skin can become beautifully crisp while the meat around the bone still needs more cooking. Always check the thickest portion of the meat.
Air Fryer Chicken Wings
Temperature: 400°F
Cooking time: Approximately 20–25 minutes
Chicken wings are particularly well suited to high-temperature air frying because the circulating heat helps render the fat and crisp the skin.
For the best results, pat the wings dry before seasoning. Excess surface moisture can make it harder for the skin to become crisp.
Arrange the wings in as close to a single layer as possible. A little overlap is sometimes unavoidable, but avoid creating a dense pile.
Shake or turn the wings during cooking.
For example, if you’re cooking wings for 22 minutes, you might check and turn them around the halfway point. If some pieces are browning faster than others, move them around the basket so the slower pieces receive better airflow.
How to Make Air Fryer Wings Extra Crispy
Crispy wings aren’t simply about increasing the temperature.
Three things matter:
- Dry the skin before cooking.
- Don’t overcrowd the basket.
- Give the wings enough time to brown properly.
If the wings are cooked but not as crisp as you’d like, you can continue cooking them for a few additional minutes while watching them carefully.
Air Fryer Chicken Tenders
Temperature: 375°F
Cooking time: Approximately 12–16 minutes
Chicken tenders are smaller and thinner than whole chicken breasts, so they cook considerably faster.
This makes them a convenient choice for a quick lunch or dinner.
If you’re using breaded chicken tenders, leave enough room around each piece for hot air to circulate. Crowding can cause the coating to become softer rather than crisp.
Turn the tenders halfway through if needed.
Fresh vs Frozen Chicken Tenders
Fresh tenders generally cook faster than frozen ones.
Frozen tenders can usually go directly into the air fryer, but the exact time depends on their size and whether they are raw or already fully cooked.
For packaged frozen chicken products, use the manufacturer’s instructions as your starting point and then adjust based on your air fryer.
Air Fryer Chicken Drumsticks
Temperature: 380°F
Cooking time: Approximately 20–25 minutes
Drumsticks are another excellent air fryer option because their skin can become nicely browned while the inside remains juicy when cooked correctly.
Pat the drumsticks dry before seasoning. Arrange them with space between each piece.
Turn them during cooking so multiple sides have an opportunity to brown.
Because drumsticks contain bone, don’t assume that the outside color tells you whether the center is ready.
Check the thickest portion of the meat with a thermometer while avoiding direct contact with the bone.
Air Fryer Chicken Nuggets
Temperature: 400°F
Cooking time: Approximately 8–12 minutes
Chicken nuggets are among the easiest foods to cook in an air fryer, particularly frozen nuggets.
There is usually no need to thaw them first.
Place the nuggets in a single layer and shake the basket halfway through cooking. This helps expose different sides to the circulating hot air.
Because nuggets vary considerably in size and thickness between brands, start checking them toward the end of the recommended range.
If the outside is already golden and crisp but the center isn’t sufficiently hot, give them a little more time rather than immediately increasing the temperature.
Air Fryer Whole Chicken
Temperature: Around 350°F–375°F
Cooking time: Approximately 45–70+ minutes, depending on size
A whole chicken requires more attention than smaller chicken pieces because its size and shape affect how quickly heat reaches the center.
Before attempting a whole chicken, make sure your air fryer basket or cooking chamber is large enough to accommodate it without blocking too much airflow.
The chicken should not be pressed tightly against the heating element.
A smaller chicken may cook within the lower end of the time range, while a larger bird can take considerably longer.
Why Whole Chicken Cooking Times Vary So Much
The biggest factors are:
- Weight
- Thickness
- Starting temperature
- Air fryer capacity
- Whether the cavity is filled
- Whether the chicken is trussed
- Air circulation around the bird
Because of these variables, never use the timer alone to determine whether a whole chicken is ready.
Check the thickest parts with a thermometer and make sure the appropriate safe internal temperature has been reached.
Air Fryer Chicken Cooking Chart
For quick reference, here’s a simplified air fryer chicken cooking time chart:
| Chicken | Temperature | Approx. Time | What to Do |
|---|---|---|---|
| Chicken breast | 375°F | 18–22 min | Flip halfway |
| Boneless chicken thighs | 380°F | 18–23 min | Flip |
| Bone-in thighs | 380°F | 20–25 min | Flip |
| Chicken wings | 400°F | 20–25 min | Shake/turn |
| Chicken tenders | 375°F | 12–16 min | Flip |
| Chicken drumsticks | 380°F | 20–25 min | Turn |
| Chicken nuggets | 400°F | 8–12 min | Shake |
| Whole chicken | 350–375°F | 45–70+ min | Check internal temp |
Again, these are starting ranges rather than universal cooking times.
How Much Chicken Can You Put in an Air Fryer?
This depends on the size and design of your air fryer.
A common mistake is assuming that if the chicken physically fits in the basket, the basket is not overcrowded.
That’s not necessarily true.
The food also needs enough room for air to move around it.
For example, suppose you have six chicken wings but your basket comfortably allows only four wings to sit with space between them. Cooking all six together may save a few minutes of preparation, but the wings may not brown evenly.
Cooking them in two smaller batches could produce much better results.
The same principle applies to chicken breast. Don’t stack multiple breasts on top of each other. Arrange them in a single layer whenever possible.
Should You Put Oil on Chicken Before Air Frying?
You don’t need large amounts of oil to cook chicken in an air fryer.
A light coating can help seasonings adhere to the surface and encourage browning, particularly when cooking lean chicken breast.
For chicken wings, you may need little or no additional oil because the skin already contains fat.
The key is moderation. Too much oil can drip into the bottom of the air fryer and may also make certain coatings greasy rather than crisp.
Air Fryer Beef Cooking Times
After chicken, beef is another food category where air frying can produce excellent results.
Steak, burgers, meatballs, and other smaller cuts can brown nicely because the hot circulating air exposes the surface to heat from all directions.
However, beef cooking times depend heavily on thickness and desired doneness.
A thin steak may cook very quickly, while a thick steak can require substantially more time.
For steaks and burgers, an instant-read thermometer is especially useful because you can stop cooking at the level of doneness you prefer instead of relying entirely on a preset time.
Air Fryer Steak Cooking Time
Temperature: 400°F
Cooking time: Approximately 8–14 minutes
Steak is one of the foods where cooking time can vary dramatically.
A thin steak may be ready in just a few minutes per side, while a thick steak requires much longer.
Before cooking, pat the steak dry. Surface moisture can interfere with browning.
Season it before placing it in the air fryer and arrange it so air can circulate around the meat.
Flip the steak approximately halfway through cooking.
Air Fryer Steak Doneness
The best way to cook steak to your preferred doneness is to monitor its internal temperature.
You may prefer:
- Rare
- Medium-rare
- Medium
- Medium-well
- Well-done
Rather than relying on a universal cooking time, use the thermometer to determine when the steak has reached your preferred level.
Remember that the internal temperature can continue to rise slightly after the steak is removed from the air fryer, so experienced cooks often account for this when deciding when to stop cooking.
Air Fryer Beef Burgers
Temperature: 375°F–400°F
Cooking time: Approximately 10–15 minutes
Air fryer burgers are convenient because you don’t need to stand over a skillet while they cook.
Form the patties with a relatively even thickness. If the center is much thicker than the edges, the outside can brown considerably before the center is cooked.
Place the patties in a single layer and flip them halfway through.
Avoid repeatedly pressing down on the burgers. Pressing can force juices out of the meat, leaving you with a drier burger.
As with other ground meat, use a thermometer to verify doneness.
Air Fryer Meatballs
Temperature: 375°F
Cooking time: Approximately 10–15 minutes
Small meatballs cook relatively quickly because hot air can reach much of their surface.
Turn or shake them during cooking to encourage even browning.
If you’re making homemade meatballs, try to keep them similar in size. A basket containing a mixture of tiny and large meatballs will not cook evenly.
For example, a small meatball may be ready while a much larger one in the same basket still needs additional time.
Air Fryer Pork Cooking Times
Pork can become deliciously browned in an air fryer, but lean cuts can also dry out if cooked too long.
That’s why thickness and internal temperature are especially important.
Air Fryer Pork Chops
Temperature: 380°F
Cooking time: Approximately 12–18 minutes
Thin pork chops can cook much faster than thick-cut chops.
Pat the chops dry, season them, and arrange them in a single layer.
Turn them halfway through cooking to encourage even browning.
Don’t automatically cook them for the longest suggested time. Start checking earlier, particularly if your chops are thin.
A thermometer is the best way to confirm that the center has reached the appropriate safe temperature without unnecessarily overcooking the meat.
Air Fryer Pork Tenderloin
Temperature: 375°F
Cooking time: Approximately 20–30 minutes
Pork tenderloin is thicker than a pork chop, so it needs more time for heat to reach the center.
Before cooking, remove excess surface moisture and season the tenderloin.
Place it in the basket with sufficient space around it.
Turn it during cooking if your air fryer browns more strongly on one side.
Once again, don’t rely solely on the clock. The size of the tenderloin and the starting temperature can change the cooking time significantly.
Air Fryer Bacon
Temperature: 350°F
Cooking time: Approximately 7–10 minutes
Bacon is one of the quickest foods to cook in an air fryer.
The exact time depends on whether you’re using thin or thick-cut bacon and how crisp you like it.
Arrange the strips without excessive overlapping.
Start checking toward the end of the cooking range because bacon can become very crisp in a short period.
For softer bacon, remove it earlier. For crispier bacon, give it another minute or two while watching closely.
Air Fryer Sausage Cooking Time
Temperature: 375°F
Cooking time: Approximately 10–15 minutes
Sausages can be cooked fresh or from frozen, although frozen sausages will generally require additional time.
Turn them during cooking so the outside browns evenly.
Large sausages may require significantly longer than thin breakfast sausages, so the cooking time should always be adjusted according to their size.
For raw sausage, use a thermometer to confirm that the center has reached the appropriate safe temperature before serving.
The Key Lesson From Meat Cooking
Across chicken, beef, and pork, the same principle keeps coming up:
Don’t confuse cooking time with doneness.
The time tells you approximately how long the food may need. The internal temperature tells you whether the meat is actually ready.
This is especially important when you’re trying a new air fryer, cooking unusually thick pieces, or preparing a larger quantity than the recipe originally intended.
Air Fryer Fish & Seafood Cooking Times
Fish and seafood are excellent choices for air frying because many varieties cook quickly and don’t require much oil. The circulating hot air can give the outside a lightly browned finish while keeping the inside tender.
However, fish is also less forgiving than some other foods. A few extra minutes can turn a delicate fillet from moist and flaky to dry. That’s why air fryer cooking times for fish should be treated as a starting range rather than an exact rule.
The thickness of the fillet is particularly important. A thin tilapia fillet may cook in less than 10 minutes, while a thick salmon portion can need considerably longer.
For best results, avoid overcrowding the basket. Leave space between individual pieces so the hot air can circulate around them.
Air Fryer Salmon Cooking Time
Temperature: 390°F
Cooking time: Approximately 8–12 minutes
Salmon is one of the easiest fish to prepare in an air fryer. The natural fat in salmon also helps keep it moist while the surface develops a lightly roasted finish.
Before cooking, pat the salmon dry with a paper towel. This removes excess surface moisture and helps the seasoning adhere better.
Place the salmon skin-side down if it has skin. There is usually no need to flip a salmon fillet because the hot circulating air can cook the top while the basket heats the underside.
How to Know When Salmon Is Done
The flesh should become opaque and should separate into flakes fairly easily when tested with a fork.
However, visual appearance isn’t always enough, particularly with thicker pieces. A thermometer provides a more reliable indication of the internal temperature.
If you prefer very moist salmon, start checking toward the lower end of the cooking range. If you prefer it more firmly cooked, it may need a little additional time.
Air Fryer Tilapia Cooking Time
Temperature: 375°F–390°F
Cooking time: Approximately 8–12 minutes
Tilapia is a relatively thin fish, which means it can cook quickly.
This is one of those foods where you should resist the temptation to set the timer and walk away. A thin fillet may be ready before you expect it.
Lightly oiling the surface can help prevent sticking and improve browning. You can season it with simple ingredients such as salt, pepper, garlic, paprika, or herbs.
Place the fillet in a single layer and check it toward the end of the recommended cooking range.
Air Fryer Cod Cooking Time
Temperature: 380°F
Cooking time: Approximately 10–14 minutes
Cod is thicker and firmer than many thin fish fillets, so it can require slightly more cooking time.
Place the cod in the basket without overlapping the pieces.
Because cod is relatively lean, overcooking can make it dry. Start checking early, especially when cooking smaller portions.
The fish should be opaque and should flake easily when cooked.
Air Fryer Fish Fillets
Temperature: 375°F–400°F
Cooking time: Approximately 8–15 minutes
The appropriate setting depends on the type and thickness of the fish.
Thin fillets generally cook quickly, while thicker portions need additional time.
If you’re cooking breaded fish, a higher temperature can help the coating become crisp. If you’re cooking a delicate unbreaded fillet, a moderate temperature may provide better control.
Fresh vs Frozen Fish
Frozen fish can usually be cooked in an air fryer, but it will often require more time than fresh or thawed fish.
Don’t assume that a frozen fillet can use exactly the same cooking time as a fresh fillet.
Instead, check the food as it approaches the expected finishing time and make sure the center is fully cooked.
Air Fryer Shrimp Cooking Time
Temperature: 400°F
Cooking time: Approximately 6–10 minutes
Shrimp cook extremely quickly, which makes them ideal for a fast air fryer meal.
Before cooking, remove excess moisture and season the shrimp.
Arrange them in a single layer where possible.
Shake or turn them approximately halfway through cooking.
One of the biggest mistakes with shrimp is leaving them in the air fryer too long. Overcooked shrimp can become firm and rubbery.
Look for shrimp that have changed from translucent to opaque and have developed a firm texture.
Air Fryer Seafood Cooking Chart
| Seafood | Temperature | Approx. Cooking Time | Helpful Tip |
|---|---|---|---|
| Salmon | 390°F | 8–12 min | Usually no flipping |
| Tilapia | 375–390°F | 8–12 min | Check early |
| Cod | 380°F | 10–14 min | Avoid overcooking |
| Fish fillets | 375–400°F | 8–15 min | Depends on thickness |
| Shrimp | 400°F | 6–10 min | Shake halfway |
| Breaded fish | 400°F | 10–15 min | Avoid overcrowding |
These air fryer cooking times are general starting points. Always adjust them according to the thickness of the fish and your specific air fryer.
Air Fryer Vegetable Cooking Times
Vegetables can be some of the easiest foods to prepare in an air fryer.
Unlike boiling, which can leave some vegetables soft and waterlogged, air frying uses dry circulating heat. This can create browned edges and a roasted flavor while keeping the inside tender.
The key is preparation.
Large vegetables take longer than small pieces. Wet vegetables can take longer to brown. And vegetables packed tightly together may steam instead of roast.
For consistently good results, cut vegetables into similar-sized pieces and leave enough space for hot air to circulate.
Air Fryer Broccoli Cooking Time
Temperature: 375°F
Cooking time: Approximately 8–12 minutes
Cut broccoli into reasonably similar-sized florets so they cook at approximately the same rate.
Pat the broccoli dry if it has been washed recently.
Toss it with a small amount of oil and your preferred seasoning before placing it in the basket.
Shake the basket around halfway through cooking.
The finished broccoli should have tender stems and browned, slightly crisp edges.
Why Does Air Fryer Broccoli Burn?
Broccoli can develop dark edges when cooked at high temperatures for too long.
If your broccoli is browning too quickly while remaining firm inside, lower the temperature slightly and extend the cooking time.
This is a good example of why simply increasing the temperature isn’t always the best solution.
Air Fryer Cauliflower Cooking Time
Temperature: 375°F
Cooking time: Approximately 10–15 minutes
Cut the cauliflower into similarly sized florets.
A light coating of oil helps the edges brown and prevents the vegetables from becoming excessively dry.
Shake the basket during cooking.
Larger florets may need additional time, so test them with a fork near the end of the recommended range.
Air Fryer Brussels Sprouts Cooking Time
Temperature: 375°F
Cooking time: Approximately 12–16 minutes
Brussels sprouts can develop excellent browned edges in an air fryer.
For larger sprouts, cutting them in half can help them cook more evenly.
Toss them with a small amount of oil before cooking and arrange them with the cut side positioned to receive good airflow.
Shake the basket during cooking.
If the outside is browning too quickly while the center remains firm, reduce the temperature slightly and allow them more time.
Air Fryer Asparagus Cooking Time
Temperature: 375°F
Cooking time: Approximately 6–10 minutes
Asparagus cooks quickly because the spears are relatively thin.
Trim the woody ends and arrange the spears in a single layer.
A little oil, salt, pepper, and garlic can be enough to create a flavorful side dish.
Start checking at around 6 minutes because thin asparagus can become tender very quickly.
Air Fryer Carrots Cooking Time
Temperature: 375°F
Cooking time: Approximately 12–18 minutes
Carrots require more time than thin vegetables such as asparagus because they are denser.
Cut them into similar-sized sticks, slices, or chunks.
Smaller pieces will cook faster, while thick chunks need more time.
Shake the basket during cooking so the pieces brown more evenly.
If you want softer carrots, cook them for longer at a moderate temperature rather than relying on extremely high heat.
Air Fryer Green Beans Cooking Time
Temperature: 375°F
Cooking time: Approximately 8–12 minutes
Fresh green beans cook quickly and can develop lightly blistered edges in an air fryer.
Trim the ends, dry them thoroughly, and toss them with a small amount of oil and seasoning.
Shake the basket once or twice during cooking.
If you prefer softer green beans, add a few minutes to the cooking time.
Air Fryer Zucchini Cooking Time
Temperature: 375°F
Cooking time: Approximately 8–12 minutes
Zucchini contains a significant amount of water, so cutting it too thick can result in a soft center and less browning.
Cut it into reasonably even slices or chunks.
Avoid piling the pieces on top of each other.
A crowded basket traps moisture and can make zucchini softer instead of nicely browned.
Air Fryer Bell Peppers Cooking Time
Temperature: 375°F
Cooking time: Approximately 8–12 minutes
Bell peppers can be cooked in strips, chunks, or larger pieces.
They become softer and sweeter as they cook, while the edges can develop some browning.
Shake the basket halfway through.
For more roasted edges, you can extend the cooking time slightly while monitoring the peppers closely.
Air Fryer Mushrooms Cooking Time
Temperature: 375°F
Cooking time: Approximately 8–12 minutes
Mushrooms release moisture as they cook, so giving them plenty of space is especially important.
If the basket is crowded, the mushrooms may steam rather than brown.
Cut larger mushrooms into halves or quarters and leave smaller mushrooms whole.
Shake them during cooking so they brown more evenly.
Air Fryer Vegetable Cooking Chart
| Vegetable | Temperature | Approx. Cooking Time | Shake/Turn |
|---|---|---|---|
| Broccoli | 375°F | 8–12 min | Shake |
| Cauliflower | 375°F | 10–15 min | Shake |
| Brussels sprouts | 375°F | 12–16 min | Shake |
| Asparagus | 375°F | 6–10 min | Shake |
| Carrots | 375°F | 12–18 min | Shake |
| Green beans | 375°F | 8–12 min | Shake |
| Zucchini | 375°F | 8–12 min | Shake |
| Bell peppers | 375°F | 8–12 min | Shake |
| Mushrooms | 375°F | 8–12 min | Shake |
| Corn | 380°F | 10–15 min | Turn |
How Much Oil Should You Use for Vegetables?
One advantage of air frying is that vegetables don’t need to be swimming in oil to brown.
For most vegetables, a light coating is enough.
The easiest approach is to place the vegetables in a bowl, add a small amount of oil, and toss them until they are lightly coated.
You can then add your seasonings.
Using excessive oil won’t necessarily make vegetables crispier. In some cases, it can make the finished food greasy and can create more smoke or residue inside the appliance.
Why Are My Air Fryer Vegetables Not Crispy?
If your vegetables come out soft instead of browned, the problem may not be the cooking temperature.
Check these factors first:
The basket is overcrowded
Too much food restricts airflow.
The vegetables are wet
Excess surface moisture can delay browning.
The pieces are too large
Large chunks require more time for the center to become tender.
You’re using too little cooking time
Some vegetables simply need additional minutes to develop the texture you want.
You’re opening the basket too frequently
Every time the basket is opened, heat escapes. Checking food is useful, but repeatedly opening it can extend the cooking process.
Air Fryer Potato & French Fry Cooking Times
Potatoes are among the most popular foods to prepare in an air fryer because the circulating heat can create a crisp exterior without deep-frying.
However, potatoes can be surprisingly sensitive to preparation.
The amount of moisture on the surface, the thickness of the pieces, the quantity in the basket, and whether the fries are frozen or fresh all affect the result.
Air Fryer Frozen French Fries
Temperature: 400°F
Cooking time: Approximately 15–20 minutes
Frozen fries are one of the easiest air fryer foods because they require very little preparation.
You generally don’t need to thaw them.
Place the frozen fries in the basket and shake them several times during cooking.
The exact time depends on the type of fries.
Thin shoestring fries may cook faster than thick-cut steak fries.
This is why checking the fries during the final few minutes is important.
Why Are My Frozen Fries Soft?
The most common causes are:
- Overcrowding
- Insufficient cooking time
- Not shaking the basket
- Too much moisture
- Cooking too many fries at once
If you want crispier fries, try reducing the amount in the basket before simply increasing the temperature.
Air Fryer Fresh-Cut French Fries
Temperature: 380°F–400°F
Cooking time: Approximately 18–25 minutes
Fresh-cut fries require more preparation than frozen fries, but the results can be excellent.
Cut the potatoes into similar-sized pieces so they cook evenly.
Soaking the cut potatoes can help remove some surface starch. After soaking, dry them thoroughly before cooking.
This drying step is important because excess water can interfere with browning.
Toss the potatoes with a light amount of oil and season them before placing them in the basket.
Shake regularly throughout cooking.
Air Fryer Potato Wedges
Temperature: 400°F
Cooking time: Approximately 18–25 minutes
Cut the potatoes into evenly sized wedges.
Toss them with a small amount of oil and your preferred seasonings.
Arrange them in the basket without packing them too tightly.
Shake or turn them during cooking.
The finished wedges should have browned edges with a tender center.
If the outside is becoming dark before the center softens, lower the temperature slightly and continue cooking.
Air Fryer Tater Tots
Temperature: 400°F
Cooking time: Approximately 12–18 minutes
Tater tots are another food that benefits from frequent shaking.
Place them in the basket and shake after several minutes.
Continue cooking until they reach the level of crispiness you prefer.
If the basket is heavily filled, expect to be closer to the upper end of the cooking range.
Air Fryer Sweet Potato Fries
Temperature: 380°F–400°F
Cooking time: Approximately 12–18 minutes
Sweet potato fries behave differently from regular potato fries because they contain more natural sugars.
That means they can brown quickly.
For this reason, don’t assume that cooking them at the highest temperature for the longest time will produce better results.
Cut them evenly, avoid overcrowding, and start checking them early.
Air Fryer Potato Cooking Chart
| Potato Food | Temperature | Approx. Time | Helpful Tip |
|---|---|---|---|
| Frozen French fries | 400°F | 15–20 min | Shake often |
| Fresh-cut fries | 380–400°F | 18–25 min | Dry thoroughly |
| Potato wedges | 400°F | 18–25 min | Turn/shake |
| Tater tots | 400°F | 12–18 min | Shake |
| Sweet potato fries | 380–400°F | 12–18 min | Check early |
| Hash browns | 400°F | 10–15 min | Flip if needed |
The Most Important Lesson for Potatoes
If your fries aren’t crisp, don’t immediately assume you need more temperature.
First look at the amount of food in the basket.
A smaller batch with good airflow will often produce better results than a large overloaded batch cooked at a higher temperature.
This is one of the most useful principles to remember when using an air fryer cooking time and temperature chart.
Air Fryer Frozen Food Cooking Times
One of the biggest reasons people buy an air fryer is the convenience of cooking frozen foods quickly without needing to turn on a large oven or use a deep fryer.
Frozen French fries, chicken nuggets, fish sticks, onion rings, spring rolls, mozzarella sticks, and other snacks can often go straight from the freezer into the air fryer.
However, frozen food doesn’t always cook exactly according to the same time listed on the package. Air fryers vary in size and heating performance, and the amount of food you put into the basket can significantly affect the result.
For that reason, use the following air fryer frozen food cooking chart as a starting point. When package instructions are available, compare them with your air fryer’s instructions and begin checking the food before the end of the suggested range.
Air Fryer Frozen Food Cooking Chart
| Frozen Food | Temperature | Approx. Cooking Time | Shake/Flip |
|---|---|---|---|
| French fries | 400°F | 15–20 min | Shake |
| Chicken nuggets | 400°F | 8–12 min | Shake |
| Chicken tenders | 400°F | 10–15 min | Flip |
| Fish sticks | 400°F | 8–12 min | Flip |
| Mozzarella sticks | 375°F | 6–8 min | Optional |
| Onion rings | 400°F | 8–12 min | Shake |
| Tater tots | 400°F | 12–18 min | Shake |
| Pizza rolls | 380°F | 7–10 min | Shake |
| Spring rolls | 390°F | 8–12 min | Turn |
| Frozen meatballs | 380°F | 10–15 min | Shake |
| Hash browns | 400°F | 10–15 min | Flip |
| Frozen vegetables | 375°F | 10–15 min | Shake |
| Frozen garlic bread | 350°F | 4–7 min | No |
These times can vary according to the size and brand of the food. Thick frozen products usually take longer than smaller pieces.
Do You Need to Thaw Frozen Food Before Air Frying?
For many frozen foods, no.
In fact, several frozen foods are specifically designed to be cooked directly from frozen.
Frozen fries, nuggets, onion rings, fish sticks, and similar convenience foods can generally be placed directly into the air fryer.
This saves preparation time and avoids the extra step of thawing.
However, not every frozen food should automatically be treated the same way. Large pieces of frozen meat or poultry may require a different cooking approach because the outside can cook much faster than the frozen center.
When you’re unsure, check the manufacturer’s instructions first.
Air Fryer Frozen Chicken Nuggets
Temperature: 400°F
Cooking time: Approximately 8–12 minutes
Frozen chicken nuggets are one of the easiest foods to prepare in an air fryer.
Place them in a single layer and avoid piling them on top of each other.
Shake the basket around halfway through cooking. This helps expose more surfaces to the hot circulating air.
Because nuggets vary in size, thickness, and coating, begin checking them around the 8-minute mark.
If they’re already crisp and hot in the center, you can stop cooking. If they need more browning, continue for another minute or two.
Air Fryer Frozen Chicken Tenders
Temperature: 400°F
Cooking time: Approximately 10–15 minutes
Frozen chicken tenders are generally thicker than nuggets, so they require more cooking time.
Arrange the pieces with space between them.
Turn them halfway through if necessary.
If the tenders are raw rather than fully cooked, be particularly careful about checking the internal temperature. Don’t assume that a golden-brown coating means the chicken inside is fully cooked.
Air Fryer Frozen Fish Sticks
Temperature: 400°F
Cooking time: Approximately 8–12 minutes
Fish sticks can become nicely crisp in an air fryer without additional oil.
Place them in a single layer and turn them halfway through cooking.
Start checking toward the end of the cooking range because thin fish sticks can become overcooked relatively quickly.
If the coating becomes dark before the inside is sufficiently hot, reduce the temperature slightly and allow more time.
Air Fryer Frozen Onion Rings
Temperature: 400°F
Cooking time: Approximately 8–12 minutes
Onion rings depend heavily on airflow to develop a crisp coating.
If you stack them in a crowded basket, some pieces may become soft while others brown more quickly.
Shake or rearrange the basket during cooking.
For a particularly large batch, cooking in two rounds may give you better results than trying to fit everything in at once.
Air Fryer Frozen Mozzarella Sticks
Temperature: 375°F
Cooking time: Approximately 6–8 minutes
Mozzarella sticks require a little more attention than fries because the cheese inside can melt and leak if they’re cooked for too long.
That’s why you shouldn’t automatically extend the cooking time simply to make the coating darker.
Check them frequently toward the end.
If the coating is golden and the cheese is hot, remove them.
Air Fryer Frozen Spring Rolls
Temperature: 390°F
Cooking time: Approximately 8–12 minutes
Spring rolls benefit from being arranged in a single layer.
Turn or shake them during cooking so they brown evenly.
If they are particularly thick, they may need a few extra minutes.
Avoid adding too much oil. Most commercially prepared frozen spring rolls already contain some oil in their coating.
Air Fryer Frozen Meatballs
Temperature: 380°F
Cooking time: Approximately 10–15 minutes
Frozen meatballs are convenient for quick meals because they can usually be heated directly from frozen.
Shake the basket during cooking to encourage even heating.
The size of the meatballs makes a major difference. Small cocktail-sized meatballs can cook faster than large meatballs.
If you’re cooking raw frozen meatballs, use a thermometer to verify that they have reached a safe internal temperature.
Why Are My Frozen Foods Not Crispy?
This is one of the most common questions about air frying.
If your frozen food comes out soft, several things may be happening.
1. You Overloaded the Basket
This is probably the first thing to check.
An air fryer needs space for hot air to circulate. A heavily packed basket restricts airflow and causes food to cook less evenly.
2. You Didn’t Shake the Basket
Small frozen foods benefit from being moved during cooking.
Shaking exposes more sides to the circulating heat.
3. The Food Has Too Much Surface Moisture
Ice and moisture can temporarily prevent crisping.
This doesn’t necessarily mean you need to add more oil or dramatically increase the temperature.
4. You Stopped Cooking Too Early
Some foods need several additional minutes to develop their final crisp texture.
5. Your Air Fryer Is Heavily Loaded
Even if the food technically fits, a full basket may require longer cooking or multiple batches.
Can You Put Aluminum Foil in an Air Fryer?
In many air fryers, aluminum foil can be used safely when the manufacturer’s instructions permit it, but it should never be used in a way that blocks the airflow or comes loose and contacts the heating element.
Avoid covering the entire basket or blocking important air vents.
If you use foil, keep it secured under food where appropriate rather than placing a loose sheet in the empty basket.
Always check your air fryer’s manual because appliance designs differ.
Air Fryer Breakfast Cooking Times
Air fryers aren’t just for lunch and dinner. They can also make several breakfast foods quickly.
The main advantage is that you can prepare relatively small portions without heating a full-size oven.
Air Fryer Bacon
Temperature: 350°F
Cooking time: Approximately 7–10 minutes
Place the bacon strips in the basket without excessive overlapping.
Thin bacon can become crisp quickly, while thick-cut bacon may need more time.
Start checking early.
If you prefer softer bacon, remove it when it has reached the texture you like. For very crisp bacon, continue cooking for another minute or two while monitoring closely.
Remember that bacon can continue to crisp slightly after it comes out of the air fryer.
Air Fryer Sausage
Temperature: 375°F
Cooking time: Approximately 10–15 minutes
Sausage can be cooked quickly in an air fryer without standing over a frying pan.
Turn the sausages halfway through cooking so the outside browns evenly.
The size matters significantly. Small breakfast sausages may finish quickly, while large sausages can take considerably longer.
For raw sausage, confirm that the center has reached the appropriate safe temperature before eating.
Air Fryer Hash Browns
Temperature: 400°F
Cooking time: Approximately 10–15 minutes
Frozen hash brown patties can be placed directly into the air fryer.
Cook them until the outside is golden and crisp.
Flip the patties if necessary to brown both sides.
If you’re cooking loose shredded hash browns rather than patties, spread them into a relatively even layer rather than creating a thick pile.
Air Fryer Breakfast Potatoes
Temperature: 400°F
Cooking time: Approximately 15–20 minutes
Cut potatoes into small, similar-sized cubes.
Toss them with a small amount of oil and your preferred seasonings.
Shake the basket several times during cooking.
Smaller cubes will cook faster, while larger pieces may need additional time.
For extra browning, make sure the potatoes aren’t packed tightly together.
Air Fryer Toast
Temperature: 350°F
Cooking time: Approximately 3–5 minutes
Toast is extremely quick in an air fryer.
The exact time depends on the type and thickness of the bread and how dark you like your toast.
Start checking early.
Because bread is lightweight, keep an eye on it and make sure it remains properly positioned in the basket.
Air Fryer English Muffins
Temperature: 350°F
Cooking time: Approximately 3–5 minutes
Split the English muffin and place the cut side facing upward.
Cook until the surface reaches your preferred level of browning.
Because the cooking time is short, checking after a few minutes is usually enough.
Air Fryer Breakfast Cooking Chart
| Breakfast Food | Temperature | Approx. Time |
|---|---|---|
| Bacon | 350°F | 7–10 min |
| Sausage | 375°F | 10–15 min |
| Hash brown patties | 400°F | 10–15 min |
| Breakfast potatoes | 400°F | 15–20 min |
| Toast | 350°F | 3–5 min |
| English muffin | 350°F | 3–5 min |
Air Fryer Snacks and Appetizer Cooking Times
An air fryer is particularly useful for snacks because many appetizers are small, frozen, and designed to become crispy.
This makes it easy to prepare a quick snack without heating a large oven.
Popular choices include:
- Mozzarella sticks
- Onion rings
- Pizza rolls
- Taquitos
- Spring rolls
- Jalapeño poppers
- Potato skins
- Mini pizzas
- Garlic bread
- Chicken nuggets
Air Fryer Onion Rings
Temperature: 400°F
Cooking time: Approximately 8–12 minutes
Place the onion rings in a single layer.
Shake or turn them halfway through.
Avoid overcrowding because the breaded coating needs good airflow to become crisp.
Air Fryer Pizza Rolls
Temperature: 380°F
Cooking time: Approximately 7–10 minutes
Pizza rolls can become extremely hot inside, even when the outside doesn’t appear overly browned.
Cook them in a single layer and shake the basket during cooking if necessary.
Allow them to cool briefly before eating to avoid burning your mouth on the hot filling.
Air Fryer Taquitos
Temperature: 400°F
Cooking time: Approximately 8–12 minutes
Arrange the taquitos with enough space around them.
Turn them during cooking if necessary.
The goal is a crisp exterior with a thoroughly heated center.
Air Fryer Garlic Bread
Temperature: 350°F
Cooking time: Approximately 4–7 minutes
Garlic bread cooks quickly because the bread is relatively thin.
Keep an eye on it toward the end.
If you prefer softer bread, remove it earlier. If you want crispier edges, allow another minute or two.
Air Fryer Snack Cooking Chart
| Snack | Temperature | Approx. Time | Tip |
|---|---|---|---|
| Mozzarella sticks | 375°F | 6–8 min | Watch for cheese leakage |
| Onion rings | 400°F | 8–12 min | Shake |
| Pizza rolls | 380°F | 7–10 min | Cool before eating |
| Taquitos | 400°F | 8–12 min | Turn |
| Spring rolls | 390°F | 8–12 min | Turn halfway |
| Garlic bread | 350°F | 4–7 min | Check early |
| Chicken nuggets | 400°F | 8–12 min | Shake |
| Potato skins | 375°F | 8–12 min | Check toppings |
Air Fryer Reheating Times and Temperatures
Reheating leftovers is another area where an air fryer can be extremely useful.
Unlike a microwave, which tends to soften crispy foods, an air fryer can help restore some of the texture that food had when it was freshly cooked.
This makes it particularly useful for:
- Pizza
- Fried chicken
- French fries
- Chicken wings
- Burgers
- Pastries
- Garlic bread
- Roasted vegetables
The key is to use a moderate temperature and avoid cooking the leftovers for longer than necessary.
Air Fryer Pizza Reheating Time
Temperature: 350°F
Cooking time: Approximately 3–6 minutes
Place the pizza slice in the basket.
There’s usually no need to add oil.
The air fryer heats the toppings while helping the crust regain some crispness.
Thin crust pizza may be ready in only a few minutes, while a thick slice may require longer.
Start checking around the 3-minute mark.
Air Fryer Fried Chicken Reheating Time
Temperature: 350°F
Cooking time: Approximately 5–10 minutes
Fried chicken can become dry if reheated too aggressively.
A moderate temperature allows the center to warm while helping the coating regain some crispness.
Arrange the pieces with space between them.
Thicker pieces will need more time than small wings.
Air Fryer French Fries Reheating Time
Temperature: 350°F
Cooking time: Approximately 3–5 minutes
Spread the fries into the basket rather than creating a thick pile.
Shake them once during reheating.
If they’re still soft after several minutes, add another minute rather than immediately increasing the temperature dramatically.
Air Fryer Chicken Wings Reheating Time
Temperature: 375°F
Cooking time: Approximately 4–7 minutes
Place the wings in a single layer.
Turn or shake them halfway through.
Because the wings are already cooked, the goal is simply to heat them thoroughly and restore some crispness.
Avoid leaving them in too long, especially if they’re small.
Air Fryer Burger Reheating Time
Temperature: 350°F
Cooking time: Approximately 3–5 minutes
Place the burger in the basket and heat until warmed through.
If the bun is included, you may want to warm the bun separately for a shorter period so it doesn’t become excessively hard.
For a thick burger, additional time may be necessary.
Air Fryer Pastry Reheating Time
Temperature: 325°F–350°F
Cooking time: Approximately 3–6 minutes
Pastries can dry out quickly, so avoid using unnecessarily high heat.
A moderate temperature helps warm the inside without burning the outside.
Check the pastry frequently because smaller items can heat very quickly.
Air Fryer Reheating Chart
| Food | Temperature | Approx. Time |
|---|---|---|
| Pizza | 350°F | 3–6 min |
| Fried chicken | 350°F | 5–10 min |
| French fries | 350°F | 3–5 min |
| Chicken wings | 375°F | 4–7 min |
| Burger | 350°F | 3–5 min |
| Garlic bread | 325–350°F | 2–5 min |
| Pastries | 325–350°F | 3–6 min |
| Roasted vegetables | 350°F | 3–6 min |
Why Air Fryers Are Good for Reheating Crispy Foods
The main advantage is the movement of hot air.
When you reheat fries or fried chicken in a microwave, moisture can soften the coating. An air fryer uses dry circulating heat, which can help drive away some surface moisture and restore a crispier texture.
It won’t always make leftovers taste exactly like freshly cooked food, but it can produce a noticeably better texture for many fried or roasted foods.
The trick is not to overheat them.
Reheating is usually about bringing the food back to a pleasant eating temperature, not cooking it all over again.
A Simple Rule for Reheating Leftovers
When reheating food in an air fryer, start with a lower temperature and shorter time than you think you need.
Check the food.
If it’s still cold in the center, continue heating in short intervals.
This prevents the common problem of having a beautifully crisp exterior surrounding a dry or overheated interior.
How to Adjust Air Fryer Cooking Times Correctly
The cooking charts in this guide give you a useful starting point, but learning how to adjust air fryer cooking times is what will make you more confident in the kitchen.
Your air fryer may cook differently from the one used to develop a recipe. Even two air fryers with the same capacity can have different heating elements, fan speeds, basket designs, and cooking chambers.
Instead of becoming frustrated when a recipe says 15 minutes but your food needs 18, learn to make small adjustments. Once you understand what affects cooking time, you can adapt almost any recipe to your appliance.
Fresh Food vs. Frozen Food
One of the first things to consider is whether the food is fresh, refrigerated, or frozen.
Frozen food starts at a much lower temperature, so it generally takes longer to heat through than refrigerated food.
For example, frozen chicken nuggets may need around 8–12 minutes at 400°F, while a similar refrigerated product may finish sooner.
However, don’t automatically add a fixed number of minutes to every frozen food. The size, thickness, and whether the product is already cooked also matter.
A Better Approach
When cooking frozen food:
- Start with the recommended temperature.
- Use the suggested cooking time as a range.
- Shake or flip when appropriate.
- Start checking toward the end of the range.
- Continue cooking in short intervals if necessary.
This gives you more control than simply adding five or ten minutes.
How Food Thickness Changes Cooking Time
Thickness is often more important than weight when determining air fryer cooking time.
Consider two chicken breasts that each weigh 8 ounces. One might be relatively flat and thin, while the other could be much thicker in the middle.
They may weigh the same, but the thicker breast will usually take longer because heat has farther to travel before reaching the center.
The same applies to:
- Steak
- Pork chops
- Fish fillets
- Potato wedges
- Chicken thighs
- Vegetable chunks
If a food is thicker than the piece used in a recipe, expect the cooking time to increase.
If it’s considerably thinner, begin checking earlier.
How to Adjust Cooking Time for Smaller Pieces
Smaller pieces generally cook faster because more of their surface area is exposed to the hot air.
For example, diced potatoes will usually cook faster than large potato wedges.
Similarly, thin chicken tenders can finish considerably sooner than thick chicken breasts.
When cutting food into smaller pieces, don’t simply use the cooking time intended for the original larger piece.
Instead, begin checking early.
This is especially important when preparing vegetables because a few extra minutes can change them from pleasantly tender to overly soft.
How to Adjust Cooking Time for Larger Pieces
Large pieces require more patience.
If you’re cooking a thick steak, large chicken breast, whole chicken, or large potato wedges, the outside may brown before the center is completely cooked.
In these situations, increasing the temperature isn’t always the best solution.
You may get better results by using a moderate temperature and allowing more time for heat to reach the center.
For meat and poultry, use a thermometer to confirm that the center has reached the appropriate safe temperature.
How to Adjust for a Full Air Fryer Basket
The amount of food in the basket can have a major effect on cooking performance.
A small batch has plenty of space for hot air to move around each piece. A full basket restricts that airflow.
This can lead to:
- Longer cooking times
- Uneven browning
- Softer food
- Some pieces finishing before others
For example, 300 grams of French fries spread loosely across a basket may become crisp faster than 600 grams packed into the same space.
If you need to cook a large amount of food, two smaller batches can often produce better results than one overloaded batch.
Should You Increase the Temperature When Food Is Taking Too Long?
Not necessarily.
If your food is taking longer than expected, first ask why.
Is the basket overcrowded?
Are the pieces unusually thick?
Was the food frozen?
Is there excessive moisture?
Did you preheat the air fryer?
If the answer is one of these, simply increasing the temperature may not solve the underlying problem.
For example, increasing the temperature on a thick chicken breast may brown the outside too quickly while the center remains undercooked.
A better approach is often to maintain a reasonable temperature and allow additional cooking time.
How to Adjust Air Fryer Cooking Times for Your Specific Model
When you buy a new air fryer, don’t assume it will cook exactly like your previous appliance.
Your new model may:
- Heat faster
- Have a stronger fan
- Have a smaller cooking chamber
- Circulate air differently
- Brown food more quickly
- Have a different basket shape
During your first few cooking sessions, pay attention to how quickly food browns.
If food consistently finishes earlier than recipes suggest, start checking it sooner.
If it regularly takes longer, allow additional time.
After several meals, you’ll have a much better understanding of your appliance.
Air Fryer Cooking Time Conversion From Oven Recipes
A common question is:
“How do I convert oven cooking time to air fryer cooking time?”
There isn’t one perfect conversion because recipes differ considerably.
An air fryer is a smaller cooking environment with strong air circulation, so many foods cook faster than they do in a conventional oven.
A practical approach is to:
- Start with a slightly lower cooking time.
- Use a similar or slightly adjusted temperature.
- Begin checking the food early.
- Add time in small increments if necessary.
For example, if an oven recipe suggests cooking a food for 25 minutes, don’t automatically assume the air fryer needs exactly 20 minutes.
Start checking earlier and judge the food by its actual appearance, texture, and internal temperature when appropriate.
Air Fryer vs. Oven Temperature: Do You Need to Lower the Temperature?
Sometimes, but not always.
There are many different oven-to-air-fryer conversion methods, but no single formula works perfectly for every recipe.
If the original recipe is designed for a conventional oven, you may need to reduce either the temperature, the cooking time, or both.
The safest approach is to monitor the food closely the first time you make it.
Once you know how the recipe behaves in your air fryer, you can record your preferred settings for future use.
When Should You Flip Food in an Air Fryer?
Flipping helps expose both sides of larger foods to the circulating heat.
You should generally consider flipping:
- Chicken breasts
- Pork chops
- Steak
- Burgers
- Fish fillets
- Chicken tenders
- Hash brown patties
For example, if a chicken breast is placed flat in the basket, the top may brown more strongly because it is closer to the heating element. Flipping it halfway through can help create more even browning.
However, not every food needs to be flipped.
Delicate foods may be better left alone if turning them could cause them to break apart.
When Should You Shake the Air Fryer Basket?
Shaking is particularly useful for smaller foods.
You can shake:
- French fries
- Tater tots
- Chicken nuggets
- Small vegetables
- Frozen snacks
- Potato cubes
- Small meatballs
A good time to shake is roughly halfway through cooking.
You don’t need to shake constantly. Opening the basket repeatedly allows heat to escape and can make cooking less efficient.
A single shake halfway through, followed by another near the end if necessary, is often enough.
How to Get Crispier Food in an Air Fryer
If your food isn’t as crispy as you expected, don’t immediately increase the cooking temperature.
Start with these adjustments.
1. Don’t Overcrowd the Basket
This is the most important step.
Hot air needs room to move around the food.
2. Dry the Food Properly
Surface moisture can prevent browning.
This is particularly important for:
- Fresh-cut fries
- Vegetables
- Chicken skin
- Fish
- Homemade breaded foods
3. Use a Small Amount of Oil
A light coating can improve browning and help seasonings stick.
You don’t need to saturate the food with oil.
4. Shake or Flip
Moving the food exposes new surfaces to the circulating heat.
5. Allow Enough Cooking Time
Some foods simply need a few additional minutes to develop a crisp exterior.6
Why Does Air Fryer Food Burn on the Outside but Stay Raw Inside?
This is usually a sign that the cooking temperature is too high for the size or thickness of the food.
For example, a very thick chicken breast can become dark on the outside before the center is fully cooked.
The solution isn’t necessarily to cook it at an even higher temperature.
Instead, try reducing the temperature slightly and allowing more time.
You should also avoid placing very thick foods too close to the heating element.
For meat and poultry, always check the center with a thermometer.
Why Is My Air Fryer Food Dry?
Dry food is often the result of overcooking.
This is especially common with lean foods such as:
- Chicken breast
- White fish
- Pork chops
- Thin beef cuts
If food is consistently dry, try checking it earlier.
You can also use a slightly lower temperature where appropriate.
Another factor is the amount of oil and moisture naturally present in the food. Lean meats have less fat and can lose moisture quickly when exposed to prolonged heat.
Why Is My Air Fryer Food Still Raw?
If food is still undercooked after the recommended time, check the following:
The pieces may be too thick
Thicker foods take longer.
The basket may be overcrowded
Restricted airflow can slow cooking.
The food may have started frozen
Frozen ingredients naturally need more time.
The air fryer may cook differently
Not every model produces the same results.
The temperature may be inaccurate
If your appliance consistently seems much hotter or cooler than expected, an oven thermometer can help you understand what’s happening.
Do You Need to Add Oil to Everything?
No.
The name “air fryer” can make it sound as though the appliance requires oil to work, but the cooking process primarily depends on circulating hot air.
Many frozen foods already contain oil.
Foods such as chicken wings also have their own natural fat.
Fresh vegetables and potatoes may benefit from a light coating of oil, but they don’t need to be soaked in it.
A useful rule is:
Use enough oil to encourage browning and prevent sticking, but not so much that the food becomes greasy.
Air Fryer Food Safety: Don’t Rely on the Timer
Cooking time and food safety are two different things.
A recipe might say chicken takes 20 minutes, but that doesn’t guarantee every chicken breast will be safely cooked after exactly 20 minutes.
Thickness, starting temperature, quantity, and air fryer performance can all affect cooking.
For meat and poultry, use a food thermometer to check the thickest part of the food.
This is particularly important when cooking:
- Chicken
- Turkey
- Ground meat
- Pork
- Seafood
- Large cuts of meat
Don’t use the outside color as the only indication that food is done.
Why Internal Temperature Matters More Than Appearance
A beautifully browned piece of chicken may still be undercooked in the center.
Conversely, food can sometimes become darker than you expected while already being fully cooked.
That’s why visual appearance and cooking time should be combined with internal temperature when appropriate.
A thermometer is especially useful when:
- You’re cooking a new recipe.
- You’re using a new air fryer.
- The food is unusually thick.
- You’re cooking from frozen.
- You’re preparing a large quantity.
- You’re unsure whether the center is done.
It takes only a few seconds to check and gives you much greater confidence.
How to Check Food Without Losing Too Much Heat
It’s perfectly fine to open an air fryer when you need to check your food.
However, repeatedly opening the basket can allow heat to escape.
Instead, plan your checks.
For example, if fries have a 15–20 minute cooking range, check them around 12–15 minutes and shake them at the same time.
If chicken needs 18–22 minutes, check it around 18 minutes with a thermometer.
This way, you’re not constantly interrupting the cooking process.
Air Fryer Cooking Times for Different Food Sizes
Here’s a simple way to think about food size:
| Food Size | What to Expect |
|---|---|
| Small/thin pieces | Usually cook faster |
| Medium pieces | Follow standard time range |
| Thick pieces | Usually need more time |
| Large whole foods | Need significantly more time |
| Frozen foods | Often need additional time |
| Overcrowded basket | May cook more slowly |
This isn’t a substitute for a recipe, but it gives you a useful framework when you’re adapting cooking times.
A Practical Air Fryer Cooking Method for Beginners
If you’re unsure how long to cook something you’ve never made before, use this five-step approach.
Step 1: Choose a Reasonable Temperature
Use a trusted recipe or cooking chart as your starting point.
Step 2: Don’t Overfill the Basket
Give the food enough room for airflow.
Step 3: Start With the Lower End of the Time Range
If the guide says 12–16 minutes, begin checking around 12 minutes.
Step 4: Shake or Flip When Appropriate
Move the food halfway through if necessary.
Step 5: Check Doneness
Look at the texture and appearance, and use a thermometer when appropriate.
This approach is much more reliable than blindly following a timer.
Master Air Fryer Temperature Guide
For quick reference, here’s a broader air fryer temperature guide you can use when planning meals.
| Temperature | Best Used For |
|---|---|
| 300–325°F | Gentle reheating, bread, delicate foods |
| 325–350°F | Pastries, reheating, bacon, lighter cooking |
| 350–375°F | Chicken, pork, fish, vegetables, everyday cooking |
| 375–390°F | Thicker meats, roasted vegetables, seafood |
| 390–400°F | Fries, wings, frozen foods, crispy snacks |
These ranges aren’t strict rules. The best temperature depends on the particular food and the result you’re trying to achieve.
Master Air Fryer Cooking Times Chart
Here’s a more complete air fryer time and temperature chart that readers can save for everyday reference.
| Food | Temperature | Cooking Time |
|---|---|---|
| Chicken breast | 375°F | 18–22 min |
| Chicken wings | 400°F | 20–25 min |
| Chicken thighs | 380°F | 20–25 min |
| Chicken tenders | 375°F | 12–16 min |
| Chicken nuggets | 400°F | 8–12 min |
| Chicken drumsticks | 380°F | 20–25 min |
| Steak | 400°F | 8–14 min |
| Burgers | 375–400°F | 10–15 min |
| Meatballs | 375°F | 10–15 min |
| Pork chops | 380°F | 12–18 min |
| Pork tenderloin | 375°F | 20–30 min |
| Bacon | 350°F | 7–10 min |
| Sausage | 375°F | 10–15 min |
| Salmon | 390°F | 8–12 min |
| Tilapia | 375–390°F | 8–12 min |
| Cod | 380°F | 10–14 min |
| Shrimp | 400°F | 6–10 min |
| Broccoli | 375°F | 8–12 min |
| Cauliflower | 375°F | 10–15 min |
| Brussels sprouts | 375°F | 12–16 min |
| Asparagus | 375°F | 6–10 min |
| Carrots | 375°F | 12–18 min |
| Green beans | 375°F | 8–12 min |
| Zucchini | 375°F | 8–12 min |
| Frozen fries | 400°F | 15–20 min |
| Fresh fries | 380–400°F | 18–25 min |
| Potato wedges | 400°F | 18–25 min |
| Tater tots | 400°F | 12–18 min |
| Sweet potato fries | 380–400°F | 12–18 min |
| Onion rings | 400°F | 8–12 min |
| Mozzarella sticks | 375°F | 6–8 min |
| Pizza rolls | 380°F | 7–10 min |
| Pizza | 350°F | 3–6 min |
| Garlic bread | 350°F | 4–7 min |
Final Tips for Using an Air Fryer Cooking Chart
A good air fryer cooking times and temperature guide should make cooking easier, not make you feel like you have to memorize dozens of numbers.
The most important thing is to understand the relationship between temperature, time, food size, quantity, and airflow.
If you’re cooking thin food, start checking early. If you’re cooking something thick, give the heat enough time to reach the center. If the basket is overcrowded, expect the food to take longer and become less crispy.
Don’t be afraid to make small adjustments. If your fries consistently finish in 17 minutes rather than 20, that’s useful information about your particular air fryer. If your chicken breast needs 21 minutes instead of 18, record that adjustment for next time.
Over time, you won’t need to constantly look at a chart because you’ll become familiar with how your appliance cooks.
Frequently Asked Questions
Do air fryers cook faster than ovens?
Often they do, particularly for small portions. The compact cooking chamber and strong circulation of hot air can help food cook and brown efficiently. However, the exact difference varies by food and appliance.
Should I always preheat my air fryer?
No. Some foods benefit from preheating, while others can be placed into a cold air fryer. Follow your appliance’s instructions and the recipe you’re using.
Can I put frozen food directly into an air fryer?
Many frozen foods can be cooked directly from frozen. Always check the package instructions, particularly when dealing with raw frozen meat or poultry.
Why is my food taking longer than the cooking chart says?
The food may be thicker, the basket may be overcrowded, the ingredients may have started frozen, or your particular air fryer may cook differently.
Why is my food burning before it is cooked?
The temperature may be too high for the thickness of the food. Try lowering the temperature and giving the food more time. For meat and poultry, check the internal temperature.
Conclusion
The best way to use an air fryer cooking times and temperature guide is to treat it as a reference rather than a rigid set of rules.
Your air fryer has its own characteristics, and your food may also differ from the food used to develop a particular recipe. A thick chicken breast, a crowded basket of fries, and a small handful of frozen nuggets will all respond differently to the same temperature.
Start with a sensible temperature, use the recommended cooking time as a range, leave enough room for airflow, and check your food before the maximum time is reached.
Most importantly, don’t rely on the timer alone when cooking meat, poultry, or other foods where internal temperature matters.
Once you understand these basic principles, an air fryer cooking chart becomes much more useful. Instead of simply following numbers, you’ll know how to adjust them—and that’s what ultimately leads to more consistent, crispy, and properly cooked meals.