
Frozen fries should be one of the easiest things to cook. Open the bag, toss them in, wait a few minutes—done.
But in reality, that’s not what most people experience.
Instead, you get:
- Fries that are soft instead of crispy
- Edges that cook too fast while the center stays cold
- Or worse—dry, overcooked fries that feel hollow inside
The problem isn’t the fries. It’s the method.
Most ovens simply don’t circulate heat well enough to crisp frozen fries evenly. You end up relying on long cooking times and constant flipping, and even then, the results are inconsistent.
This is where the air fryer completely changes things.
Because it uses rapid hot air circulation in a compact space, it cooks frozen fries faster and more evenly—giving you that crisp outside and fluffy inside without deep frying.
But here’s the catch:
You still need the right approach.
Temperature, timing, basket space, and even when you shake the fries all play a role in the final result.
That’s what this guide is built for.
Inside this air fryer frozen fries guide, you’ll learn:
- The exact time and temperature that actually works
- How to cook different types of fries (without guessing)
- Simple adjustments that make fries noticeably crispier
- The common mistakes that quietly ruin your results
If your goal is simple—crispy frozen fries in the air fryer every time—you’re in the right place.
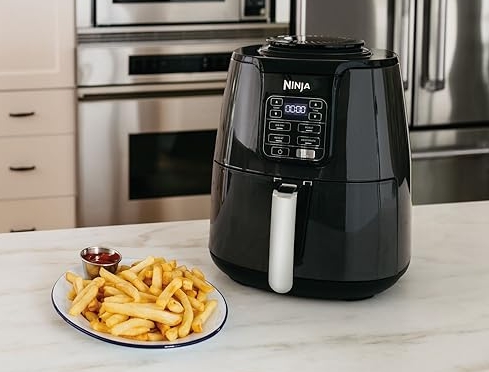
Why Use an Air Fryer for Frozen Fries?
If you’ve been using an oven for frozen fries, switching to an air fryer feels like an upgrade you notice immediately.
Not in theory—in actual results.
Faster Cooking Without Compromise
With an oven, you’re usually looking at:
- 10–15 minutes preheating
- 20–30 minutes cooking
That’s easily 30–40 minutes total.
An air fryer cuts that down to:
- Little to no preheat
- 10–20 minutes cooking
You’re saving time, but more importantly, you’re not sacrificing texture.
Crispier Results (This Is the Big One)
Air fryers are built around one thing: tight, fast airflow.
That airflow:
- Removes surface moisture quickly
- Allows fries to crisp evenly
- Prevents the steaming effect you get in ovens
That’s why you get fries that are:
- Golden on the outside
- Soft and fluffy inside
Instead of soft, uneven pieces.
No Extra Oil Needed
Most frozen fries are already lightly coated in oil during processing.
In an oven, that oil isn’t always enough to create crispiness.
In an air fryer, it usually is.
That means:
- No deep frying
- No heavy oil use
- Less mess
And still better texture.
More Consistent Results
With an oven, small things affect your outcome:
- Tray position
- Uneven heating
- Whether you flipped at the right time
With an air fryer:
- Heat is concentrated
- Cooking is more predictable
- Results are easier to repeat
Once you get your timing right, you can expect the same outcome every time.
Better for Everyday Cooking
This is where the air fryer really fits in.
You’re not just cooking fries for a big meal—you’re:
- Making quick snacks
- Preparing sides in minutes
- Cooking small batches without heating a full oven
It’s efficient, simple, and practical.
Note:
If your goal is the best way to cook frozen fries in an air fryer, it comes down to this:
- Faster than oven
- Crispier than oven
- Easier to control
- More consistent
And once you understand how to use it properly, it becomes the most reliable method in your kitchen.
Air Fryer Frozen Fries Time and Temperature (Tested Sweet Spot)
If your fries have ever come out soggy, uneven, or overly dry, there’s a very high chance the issue was time and temperature—not the air fryer itself.
This is where most guides stay vague. But in real use, small adjustments here make a big difference.
Let’s break it down properly.
Best Temperature for Frozen Fries in Air Fryer
You’ll typically see recommendations between 180°C and 200°C, but here’s how to actually use that range:
180°C (360°F) — The “Safe Start”
This is your baseline.
Use this temperature when:
- Cooking thick or steak fries
- You want even cooking inside first
- You’re unsure about your air fryer’s power
At 180°C:
- Fries cook through without burning
- You reduce the risk of dry edges
- Texture develops gradually
👉 Think of this as your control setting.
200°C (400°F) — The Crisping Zone
This is where crispiness happens.
Use this temperature when:
- Cooking thin or shoestring fries
- Finishing fries for extra crunch
- You want that golden, slightly crispy edge
At 200°C:
- Moisture evaporates faster
- Edges crisp up quickly
- Color develops faster
👉 But here’s the catch:
Starting at 200°C from the beginning can overcook the outside before the inside is ready, especially with thick fries.
The Tested Method (What Actually Works Best)
Instead of choosing one temperature, the best results come from using both:
- Start at 180°C → cook evenly
- Finish at 200°C → crisp the outside
This two-step method gives you:
- Soft, fluffy inside
- Proper crisp outside
- Even cooking from edge to center
It’s a small adjustment—but it’s what separates average fries from really good ones.
How Long to Cook Frozen Fries in Air Fryer
Now let’s talk timing.
Cooking time depends heavily on thickness, but these ranges are reliable starting points.
Thin Fries (Shoestring)
- 10–12 minutes total
- Shake at least twice
These cook fast and crisp easily—but burn just as fast if ignored.
Regular Cut Fries
- 12–15 minutes total
- Shake every 5 minutes
This is the most forgiving type and easiest to get right.
Thick / Steak Fries
- 15–20 minutes total
- Start at 180°C, finish at 200°C
These need more time for the inside to cook properly. Rushing them leads to crispy outside + undercooked center.
What Actually Affects Cooking Time (Real-World Factors)
Even with the best guide, your results can vary slightly. Here’s why:
1. Basket Load (Big One)
- Half-full basket → faster, crispier
- Overloaded basket → slower, softer
👉 Overcrowding is one of the biggest reasons people miss that crispy finish.
2. Air Fryer Size & Power
- Smaller units → cook faster
- Larger baskets → may need extra minutes
Not all air fryers circulate heat the same way.
3. Fry Thickness & Brand
Some frozen fries are:
- Pre-cooked differently
- Coated more heavily in oil
- Cut thicker or thinner than expected
That’s why it’s always good to check at the 10-minute mark, no matter what.
Simple Timing Formula You Can Trust
If you want something easy to remember:
- Start checking at 10 minutes
- Shake every 4–5 minutes
- Add 2–5 extra minutes as needed
- Finish with high heat for crispiness
That’s the core of mastering air fryer frozen fries time and temperature.
Quick Reality Check (Important)
There’s no single “perfect” time that works for every situation.
What works consistently is:
- Watching texture, not just time
- Adjusting slightly based on your fryer
- Using the start low → finish high approach
Once you do that, your results become predictable—and that’s when the air fryer really starts to feel effortless.
Step-by-Step: How to Cook Frozen Fries in Air Fryer
This is the part most people want: a clear process that just works—no guessing, no trial and error.
The method below is what consistently delivers crispy frozen fries in an air fryer, whether you’re cooking a quick snack or a full batch.
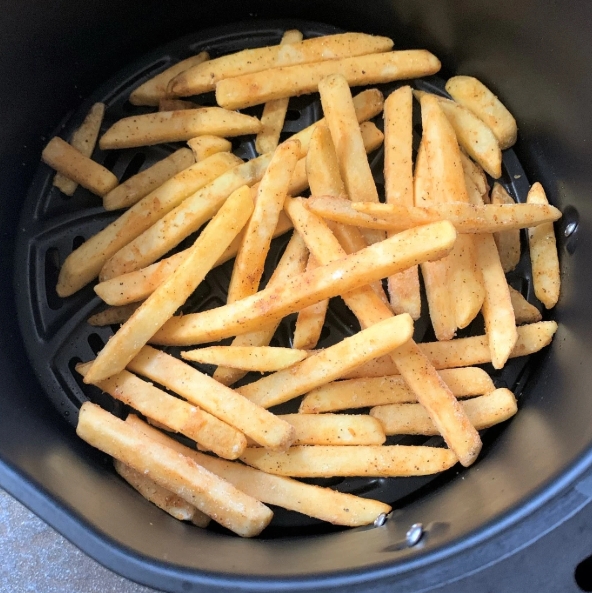
Step 1: Preheat the Air Fryer (Optional—but Worth It)
Not every air fryer requires preheating, but in real use, it does make a difference.
Why it helps:
- Fries start cooking immediately
- Outer layer crisps faster
- Reduces uneven texture
What to do:
- Preheat at 180°C for 2–3 minutes
If you skip this step, your fries will still cook—but they may take slightly longer and won’t crisp as evenly at the start.
Step 2: Add Fries (Don’t Overcrowd the Basket)
This step is more important than it looks.
A lot of people load the basket thinking:
“More fries = more efficient cooking”
But in an air fryer, the opposite is true.
Why overcrowding ruins fries:
- Blocks airflow
- Traps steam
- Leads to soft, uneven texture
Best approach:
- Keep fries in a single layer if possible
- If cooking a large batch, do it in two rounds
👉 If you absolutely must fill the basket, be ready to shake more frequently.
Step 3: Start Cooking at the Right Temperature
This is where the earlier section comes into play.
Set your air fryer to:
- 180°C to start
This gives the fries time to:
- Heat through evenly
- Cook the inside properly
- Avoid burning the edges too early
Step 4: Shake the Basket (This Is Not Optional)
If there’s one habit that instantly improves results, it’s this.
When to shake:
- Every 4–5 minutes
Why it matters:
- Prevents fries from sticking together
- Exposes all sides to hot air
- Ensures even browning
Skipping this step is one of the main reasons people end up with:
- Some fries crispy
- Others soft or undercooked
Step 5: Finish at Higher Heat for Crispiness
Once your fries are almost done, this is where you lock in the texture.
What to do:
- Increase temperature to 200°C
- Cook for an additional 2–3 minutes
What this does:
- Drives out remaining moisture
- Creates that golden, crispy finish
- Improves color and texture
This small step is often the difference between:
- “Good enough” fries
- And fries that actually feel properly cooked
Step 6: Season After Cooking (Not Before)
This is one of those small details that gets overlooked.
Why seasoning after cooking works better:
- Salt doesn’t pull out moisture during cooking
- Fries stay crisp instead of soft
- Flavors stick better to hot fries
Simple approach:
- Add salt immediately after cooking
- Toss gently in the basket or bowl
You can also add:
- Paprika
- Garlic powder
- Black pepper
But keep it light—too much can overpower the fries.
The Simple Method (Quick Recap)
If you want the fastest version of everything above:
- Preheat (optional)
- Add fries (don’t overcrowd)
- Cook at 180°C
- Shake every 5 minutes
- Finish at 200°C for 2–3 minutes
- Season after cooking
That’s the full air fryer fries instructions—simple, repeatable, and reliable.
What This Method Fixes (Real Results)
When you follow this properly, you’ll notice:
- No more soggy fries
- No uneven cooking
- No dry or overcooked batches
Instead, you get:
- Crisp outside
- Soft inside
- Even color and texture
And most importantly—you won’t have to guess anymore.
Types of Frozen Fries and How They Affect Cooking
Not all frozen fries are designed the same way. Even if the packaging looks similar, thickness, coating, and moisture levels can completely change how they behave in an air fryer.
Once you understand this, you stop guessing and start adjusting like someone who actually knows what they’re doing.
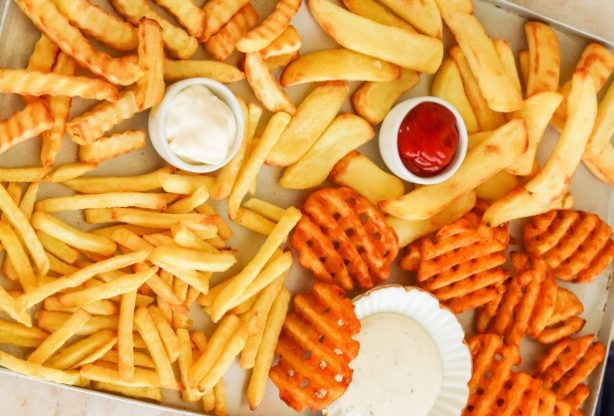
Shoestring Fries (Thin Cut)
These are the fastest-cooking fries—and also the easiest to mess up.
What they’re like:
- Very thin cut
- High surface area
- Crisp quickly with minimal effort
Cooking behavior in air fryer:
- They cook fast (sometimes too fast)
- Crisp edges appear within minutes
- Can burn if you leave them unattended
Best method:
- Temperature: 190–200°C
- Time: 10–12 minutes
- Shake: every 3–4 minutes
👉 Key insight: Shoestring fries reward attention. Even 1–2 extra minutes can take them from crispy to overdone.
Crinkle-Cut Fries (Balanced Classic)
This is the most “forgiving” type of frozen fries and the one most people use at home.
What they’re like:
- Medium thickness
- Ridged surface holds seasoning well
- Balanced crisp + soft interior
Cooking behavior:
- Cook evenly
- Crisp up nicely without much effort
- Harder to burn compared to thin fries
Best method:
- Temperature: 180–190°C
- Time: 12–15 minutes
- Shake: every 5 minutes
👉 These are ideal for beginners because they respond well even if your timing isn’t perfect.
Steak Fries (Thick Cut)
These are where patience matters.
What they’re like:
- Thick, chunky cuts
- Soft interior takes longer to heat
- Crisping happens later in cooking cycle
Cooking behavior:
- Slow to heat through
- Exterior may look done before inside is ready
- Needs controlled heat to avoid dry edges
Best method:
- Start: 180°C for even cooking
- Finish: 200°C for crisping
- Time: 15–20 minutes total
- Shake: every 5–6 minutes
👉 Key insight: If you rush steak fries, you get a crunchy outside and raw-ish inside. Slow and steady wins here.
Sweet Potato Fries (Tricky but Popular)
These behave differently from regular potato fries.
What they’re like:
- Naturally higher sugar content
- Softer texture
- Browns faster than regular fries
Cooking behavior:
- Cook faster than expected
- Burn edges easily
- Can turn soft if overcrowded
Best method:
- Temperature: 170–180°C
- Time: 10–14 minutes
- Shake: at least twice
👉 Important: Sweet potato fries need gentler heat. High temperatures often ruin them before the inside finishes properly.
Why Fry Type Changes Everything
Most people assume:
“Frozen fries = same cooking method”
But in reality:
- Thickness changes heat penetration
- Coating affects crisping speed
- Sugar content affects browning rate
That’s why one batch comes out perfect and the next feels off—even in the same air fryer.
Simple Adjustment Rule (Easy to Remember)
Here’s a practical way to handle any fry type:
- Thin fries → High heat, short time
- Medium fries → Balanced heat and timing
- Thick fries → Lower start, high finish
- Sweet potato → Lower heat, careful monitoring
Real-World Tip (What Experts Actually Do)
If you’re cooking fries regularly, the real trick isn’t memorizing exact numbers.
It’s this:
- Check early
- Adjust slightly
- Don’t rely on one fixed time
Because even two brands of “crinkle-cut fries” can cook differently.
What This Section Changes for You
Once you understand fry types, you stop:
- Overcooking thin fries
- Undercooking thick fries
- Blaming the air fryer for inconsistent results
And you start getting:
- Predictable texture
- Better crisp control
- More consistent batches
How to Make Frozen Fries Crispy in Air Fryer (Expert Tips)
Most people can cook fries in an air fryer.
But getting them consistently crispy—not just “okay”—comes down to a few small adjustments that are easy to miss.
These are the exact habits that make the difference.
1. Don’t Overcrowd the Basket (This Matters More Than You Think)
If there’s one rule you follow, make it this.
Air fryers rely on hot air circulation, not direct heat like a pan. When you overload the basket:
- Air can’t move freely
- Steam gets trapped
- Fries soften instead of crisp
What you should do instead:
- Keep fries in a single layer when possible
- If cooking more, split into two batches
👉 Real-world result: less quantity per batch = significantly better texture.
2. Shake More Than Once (Not Just Halfway)
A lot of guides say “shake halfway through.” That’s not enough.
Better approach:
- Shake every 4–5 minutes
Why it works:
- Moves fries from the bottom to the top
- Prevents sticking and clumping
- Ensures all sides get equal exposure to heat
If you’ve ever had:
- Crispy fries on top
- Soft fries underneath
This is exactly what fixes it.
3. Use a Light Oil Spray (Only When Needed)
Here’s the truth:
Most frozen fries already contain oil.
But sometimes, especially with cheaper or very dry brands, they don’t crisp as well.
When to use oil:
- Fries look pale and dry
- You’re not getting browning
How to use it properly:
- Light spray only (don’t soak them)
- Spray halfway through cooking—not at the start
👉 Too much oil doesn’t make fries crispier—it makes them heavier and less airy.
4. Finish With High Heat (The Game-Changer Step)
This is the step most people skip—and it shows in the final result.
What to do:
- Increase temperature to 200°C in the last 2–3 minutes
Why it works:
- Rapidly removes surface moisture
- Adds that final crisp layer
- Improves color and texture
Think of this as your “finishing move” for fries.
5. Season After Cooking (Not Before)
It sounds minor, but it makes a noticeable difference.
If you season before cooking:
- Salt draws moisture out
- Fries soften during cooking
If you season after:
- Fries stay crisp
- Flavor sticks better to hot surfaces
Best approach:
- Add salt immediately after cooking
- Toss lightly for even coverage
6. Preheat for Better Crisp (Optional but Effective)
Preheating isn’t required—but it helps.
Why it works:
- Fries hit hot air instantly
- Outer layer starts crisping right away
Even a 2–3 minute preheat can improve texture, especially with thinner fries.
7. Give Fries Space (Even When You Think You Have Enough)
Sometimes the basket doesn’t look full—but fries are still too close together.
What happens:
- Steam builds up between fries
- Edges soften instead of crisp
Quick fix:
- Spread fries out slightly
- Avoid piling them into a tight heap
Airflow is everything.
The Crispiness Checklist (Quick Reference)
If your fries aren’t coming out right, run through this:
- ✔ Basket not overcrowded
- ✔ Fries shaken multiple times
- ✔ Temperature finishes high (200°C)
- ✔ Minimal oil used
- ✔ Seasoning added after cooking
If one of these is missing, your results will feel off.
What These Tips Actually Change
When you apply these consistently, you’ll notice:
- Fries develop a proper outer crunch
- No soggy or soft spots
- Better color and texture
- More consistent results across batches
This is how you go from:
“They’re okay”
to
“These are actually crispy.”
Practical Takeaway
If you remember nothing else from this section, remember this combination:
- Don’t overcrowd
- Shake often
- Finish hot
That alone solves most crispiness issues.
Common Mistakes That Ruin Air Fryer Fries
If your fries keep coming out inconsistent—sometimes good, sometimes disappointing—it’s almost always one of these issues.
The tricky part? Most of them don’t look like mistakes while you’re cooking.
Let’s break them down properly.
1. Overloading the Basket
This is the most common—and most damaging—mistake.
It feels efficient to fill the basket, especially when you’re cooking for more than one person. But in an air fryer, that works against you.
What actually happens:
- Fries sit on top of each other
- Airflow gets blocked
- Steam builds up between layers
Instead of crisping, the fries:
- Soften
- Cook unevenly
- Turn pale instead of golden
What to do instead:
- Cook in smaller batches
- Or shake more frequently if the basket is full
👉 If your fries are coming out soggy, this is the first thing to fix.
2. Cooking at the Wrong Temperature
Temperature isn’t just about “hot enough”—it’s about when you use the heat.
Common problems:
- Too low (160–170°C):
Fries dry out slowly without crisping - Too high from the start (200°C+):
Outside cooks too fast, inside stays underdone
Better approach:
- Start at 180°C
- Finish at 200°C
This gives you balanced cooking and proper crispiness.
3. Not Shaking the Fries
This one gets overlooked more than it should.
If fries stay in the same position the entire time:
- The bottom layer gets less airflow
- Fries stick together
- Cooking becomes uneven
What you’ll notice:
- Some fries crispy
- Others soft or pale
Fix:
- Shake every 4–5 minutes
- Don’t wait until halfway
It’s a simple step, but it changes everything.
4. Skipping the Final Crisp Step
A lot of people stop cooking as soon as fries “look done.”
That’s usually too early.
What happens when you stop early:
- Fries are cooked—but not fully crisp
- Texture feels soft after a few minutes
What to do instead:
- Add 2–3 minutes at 200°C at the end
This final step:
- Locks in crispiness
- Improves color
- Gives fries that finished texture
5. Adding Too Much Oil
It sounds like more oil would help, but in an air fryer, it often does the opposite.
Too much oil leads to:
- Heavy, greasy fries
- Reduced airflow around the surface
- Less crispiness overall
Better approach:
- Use a light spray only if needed
- Skip oil entirely if fries already look coated
6. Not Adjusting for Fry Type
Using the same settings for every fry is a mistake.
What happens:
- Thin fries burn
- Thick fries stay undercooked
- Sweet potato fries brown too quickly
Each type needs small adjustments (as covered earlier).
7. Ignoring Your Air Fryer’s Behavior
Not all air fryers cook the same.
Some:
- Run hotter than expected
- Circulate air more aggressively
- Cook faster or slower than average
What this means for you:
- The first batch is your test run
- You may need to adjust time slightly
👉 If your fries cook faster than expected, reduce time—not temperature.
Quick Fix Guide (When Things Go Wrong)
If your fries don’t turn out right, here’s how to troubleshoot fast:
- Soggy fries?
→ Reduce basket load + increase heat at the end - Burnt outside, raw inside?
→ Lower starting temperature - Uneven cooking?
→ Shake more often - Dry, hard fries?
→ Reduce cooking time slightly
What This Section Really Does
Once you avoid these mistakes, you eliminate:
- Guesswork
- Inconsistent batches
- Wasted ingredients
And you gain:
- Control over texture
- Repeatable results
- Confidence using your air fryer
Note:
Most air fryer problems aren’t complicated—they’re just small habits that add up.
Fix those habits, and your fries improve immediately.
Do You Need Oil for Frozen Fries in Air Fryer?
Short answer: No, you don’t need oil for most frozen fries.
But in some situations, a small amount can improve your results.
Let’s break it down properly so you’re not guessing.
Why Most Frozen Fries Don’t Need Oil
When frozen fries are processed, they’re usually:
- Par-cooked (partially fried)
- Lightly coated in oil before freezing
That coating is already enough for:
- Browning
- Crisping
- Basic texture development
This is why you can cook frozen fries straight from the bag and still get decent results.
When Cooking Without Oil Works Best
You can safely skip oil if:
- You’re using well-known or premium brands
- Fries already look slightly glossy or coated
- You’re cooking thin or regular-cut fries
What to expect:
- Crisp outside
- Light texture
- Less greasy finish
This is ideal if you want a cleaner, lighter result.
When Adding Oil Actually Helps
There are cases where a little oil makes a noticeable difference.
Add oil if:
- Fries look dry or powdery
- They’re not browning properly
- You’re cooking thick-cut or steak fries
- You want a slightly richer, crispier finish
In these situations, oil helps:
- Improve surface contact with heat
- Enhance color
- Boost crispiness slightly
How to Use Oil Properly (This Is Where People Get It Wrong)
Adding oil isn’t the problem—adding too much is.
Best method:
- Use a light spray only
- Spray midway through cooking, not at the start
Why this works:
- Fries have already heated up
- Oil distributes more evenly
- You avoid soggy buildup at the beginning
What Happens If You Use Too Much Oil
More oil doesn’t mean more crispiness.
It usually leads to:
- Heavier fries
- Reduced airflow
- Slightly greasy texture
In an air fryer, crispiness comes from air movement, not oil saturation.
Oil vs No Oil (Real-World Comparison)
Without oil:
- Lighter texture
- Cleaner taste
- Slightly less golden
With a light spray:
- Better browning
- Slightly crispier edges
- Richer finish
Both work—it depends on your preference.
Best Oils to Use (If You Choose To)
If you’re adding oil, keep it simple.
Good options:
- Vegetable oil
- Sunflower oil
- Canola oil
Avoid:
- Heavy oils (they coat too thickly)
- Butter (burns quickly)
Practical Takeaway
If you’re unsure, start with no oil.
Then:
- Check your results
- Add a light spray next time if needed
That way, you’re adjusting based on what your fries actually need—not guessing.
Note:
You can absolutely cook frozen fries in an air fryer without oil and get great results.
But a small, controlled amount can improve:
- Crispiness
- Color
- Overall finish
The key is balance—not more oil.
Do You Need to Preheat Air Fryer for Frozen Fries?
Short answer: No, you don’t have to preheat your air fryer.
But if you’re aiming for better texture and more consistent crispiness, it’s worth doing.
Let’s break down when it matters—and when you can skip it.
What Preheating Actually Does
Preheating simply means letting your air fryer reach cooking temperature before adding the fries.
Why this helps:
- Fries start cooking immediately
- Outer layer crisps faster
- Cooking becomes more predictable
Without preheating, the fries sit in a gradually heating environment, which can:
- Delay crisping
- Lead to slightly uneven texture
- Add a few extra minutes to cooking time
When You Should Preheat
Preheating makes the biggest difference in these situations:
1. When You Want Extra Crispiness
Starting hot helps develop that outer crust early.
2. When Cooking Thin Fries
Shoestring fries benefit the most—they crisp quickly and evenly when heat is immediate.
3. When You Care About Consistency
If you want repeatable results every time, preheating removes one variable.
When You Can Skip Preheating
You can safely skip it if:
1. You’re in a Hurry
It saves a few minutes and still gets decent results.
2. You’re Cooking Thick Fries
Steak fries take longer anyway, so the difference is less noticeable.
3. Your Air Fryer Heats Very Fast
Some models reach temperature quickly enough that preheating becomes less important.
How to Preheat Properly
If you decide to do it, keep it simple:
- Set your air fryer to 180°C
- Let it run empty for 2–3 minutes
That’s enough to get the internal air hot and ready.
Common Mistake to Avoid
Don’t over-preheat.
Leaving your air fryer running too long before adding food can:
- Dry out the interior air too much
- Cause fries to cook too aggressively at the start
You only need a short preheat—not a full oven-style warm-up.
Real-World Difference (What You’ll Notice)
Without preheating:
- Fries take slightly longer
- Crisping starts later
- Texture is still good, but less sharp
With preheating:
- Faster initial crisp
- More even browning
- Slightly better overall texture
It’s not a dramatic difference—but it’s noticeable, especially if you cook fries often.
Practical Takeaway
If you want the easiest rule:
- Cooking casually? → Skip preheating
- Want better results? → Preheat for 2–3 minutes
That’s it.
Note:
Preheating isn’t required—but it’s one of those small steps that quietly improves your results.
If you’re trying to get that crispy frozen fries air fryer finish, it’s worth adding to your routine.
Air Fryer Frozen Fries Cooking Chart (Quick Reference)
When you don’t feel like rereading the entire guide, this quick-reference chart gives you a reliable starting point. While every air fryer cooks a little differently, these settings have been tested across popular basket-style and oven-style air fryers and will work well for most brands.
The key is to treat this chart as a starting point rather than an absolute rule. Factors such as your air fryer’s wattage, basket size, the brand of frozen fries, and how full the basket is can all affect the final cooking time.
Recommended Air Fryer Frozen Fries Cooking Chart
| Type of Frozen Fries | Temperature | Cooking Time | Shake Basket | Best For |
|---|---|---|---|---|
| Shoestring Fries | 200°C (400°F) | 10–12 minutes | Every 3–4 minutes | Extra crispy texture |
| Regular Cut Fries | 190°C (375°F) | 12–15 minutes | Every 5 minutes | Everyday meals |
| Crinkle-Cut Fries | 190°C (375°F) | 13–16 minutes | Every 5 minutes | Crispy outside, fluffy inside |
| Steak Fries | 180°C (360°F), finish at 200°C | 15–20 minutes | Every 5–6 minutes | Thick-cut fries |
| Waffle Fries | 190°C (375°F) | 12–15 minutes | Every 4–5 minutes | Crispy edges |
| Curly Fries | 190–200°C | 10–14 minutes | Every 4 minutes | Seasoned fries |
| Sweet Potato Fries | 170–180°C | 10–14 minutes | Every 4–5 minutes | Softer interior with crisp edges |
Pro Tip: Always check your fries about 2 minutes before the recommended cooking time ends. It’s much easier to cook fries a little longer than to rescue an overcooked batch.
How Different Air Fryers Can Affect Cooking Time
One of the biggest mistakes people make is assuming every air fryer cooks exactly the same.
In reality, cooking performance varies depending on the appliance you own.
Basket Air Fryers
Basket air fryers concentrate heat in a smaller cooking chamber, allowing hot air to circulate quickly around the food.
Benefits:
- Faster cooking
- Crispier fries
- More even browning
If you’re using a basket-style air fryer, you may find that your fries finish 1–2 minutes earlier than the chart suggests.
Air Fryer Ovens
Air fryer ovens have a much larger cooking cavity.
While they can cook more food at once, they sometimes require slightly longer cooking times because hot air has more space to circulate.
You may need to add:
- 1–3 extra minutes for thick fries
- Rotate trays halfway through cooking if using multiple racks
Air Fryers with Dual Baskets
Dual-basket models are perfect for cooking fries alongside another food like chicken tenders or fish fillets.
However, if both baskets are running at the same time, some models distribute power between them.
This may increase cooking time slightly.
Adjust Cooking Time Based on Quantity
The amount of fries in the basket has a huge impact on the final result.
Small Batch (1–2 Servings)
About 200–300 grams
- Fastest cooking
- Maximum crispiness
- Minimal shaking required
This is the ideal amount if you want restaurant-style fries.
Medium Batch (3–4 Servings)
About 400–600 grams
This is the sweet spot for most family meals.
You’ll still get excellent results as long as you:
- Shake regularly
- Avoid packing fries too tightly
Large Batch (5+ Servings)
Cooking a large amount all at once may seem convenient, but it often produces disappointing results.
When the basket is overloaded:
- Fries steam instead of crisping
- Cooking becomes uneven
- Some fries brown while others remain soft
If you’re feeding a family, it’s usually better to cook two smaller batches rather than one oversized batch.
Although it takes a few extra minutes, the improvement in texture is well worth it.
Signs Your Frozen Fries Are Perfectly Cooked
Instead of relying only on the timer, look for these visual cues.
Your fries are ready when they have:
- A deep golden color
- Crispy, lightly browned edges
- A fluffy potato center
- No icy or pale spots
- A crunchy exterior when picked up with tongs
These signs are much more reliable than simply following the clock.
Signs Your Fries Need More Time
If your fries look like this, keep cooking for another 2–3 minutes:
- Pale yellow color
- Soft exterior
- Cold center
- Little or no crispiness
- Slightly wet appearance
Always add extra cooking time in small increments rather than all at once.
Signs You’ve Overcooked Your Fries
Even an air fryer can overcook frozen fries if you’re not paying attention.
Watch out for:
- Dark brown or black edges
- Extremely dry texture
- Hollow centers
- Bitter or burnt taste
- Excessive hardness after cooling
If this happens regularly, reduce your cooking time by 1–2 minutes the next time you make the same brand of fries.
Quick Tips for Consistent Results Every Time
Before you start cooking, run through this simple checklist:
- ✓ Preheat the air fryer for 2–3 minutes (optional but recommended)
- ✓ Don’t thaw frozen fries before cooking
- ✓ Arrange fries in a single layer whenever possible
- ✓ Shake the basket every 4–5 minutes
- ✓ Finish at a higher temperature for extra crispiness
- ✓ Season immediately after cooking
- ✓ Serve while hot for the best flavor and texture
Following these simple habits will give you more consistent results than relying on cooking time alone.
Expert Verdict
Think of this cooking chart as your foundation, not a strict rulebook. Every air fryer has its own cooking characteristics, and every frozen fry brand varies slightly in thickness and coating.
The best approach is to use the recommended temperature and time as your starting point, then make small adjustments based on your appliance and your preferred level of crispiness. After a couple of batches, you’ll know exactly what settings produce perfectly golden, crispy fries in your own air fryer—making every future batch quick, easy, and consistently delicious.
Can You Stack Fries in an Air Fryer?
One of the most common questions people ask is, “Can you stack fries in an air fryer?” The answer is yes—but only if you’re willing to sacrifice crispiness. If your goal is perfectly golden, crunchy fries, stacking isn’t the best approach.
Air fryers work by circulating extremely hot air around the food. When fries are piled on top of each other, that airflow is restricted, causing the fries to steam instead of crisp.
Let’s look at what actually happens and how to cook larger batches without compromising quality.
Short Answer: Can You Stack Fries in an Air Fryer?
Technically, yes.
For the best results, no.
If you’re only warming a small amount of fries, a slight overlap isn’t a big issue. However, piling a large amount into the basket almost always leads to uneven cooking.
For consistently crispy fries, spread them into a single, even layer whenever possible.
Why Stacking Fries Doesn’t Work Well
The secret behind every air fryer is airflow.
Unlike a deep fryer, which cooks food by surrounding it with hot oil, an air fryer cooks by moving hot air rapidly around every surface of the food.
When fries are stacked:
- Hot air can’t reach every fry.
- Steam becomes trapped between the layers.
- Moisture can’t escape efficiently.
- The fries on the bottom receive less direct heat.
The result is a batch with mixed textures—some fries are crispy, while others remain soft or undercooked.
What Happens When You Overfill the Basket?
Overloading the basket doesn’t just affect crispiness.
It can also cause:
Uneven Cooking
Some fries brown quickly while others stay pale.
Longer Cooking Times
Because hot air can’t circulate properly, the entire batch takes longer to cook.
Soggy Fries
Instead of roasting, the trapped moisture creates steam, preventing the fries from developing a crispy exterior.
More Frequent Shaking
You’ll need to shake the basket more often just to help redistribute the fries.
Even then, the results usually won’t match a properly spaced batch.
Is a Small Amount of Overlapping Okay?
Yes.
A slight overlap is perfectly normal, especially if you’re cooking a family-sized portion.
The key is to avoid creating a thick pile.
If the fries are only lightly touching each other, your air fryer can still circulate enough hot air to cook them evenly.
Best Way to Cook Large Batches of Frozen Fries
If you’re feeding several people, don’t try to cook everything at once.
Instead, use one of these methods.
Option 1: Cook in Two Smaller Batches (Recommended)
This is the easiest way to maintain crispy results.
Although it takes a few extra minutes, you’ll end up with fries that are evenly cooked and much more enjoyable to eat.
Option 2: Shake More Frequently
If you must cook a full basket:
- Shake every 3–4 minutes.
- Separate any fries that stick together.
- Add an extra 2–4 minutes to the cooking time if needed.
While this improves the outcome, it still won’t be quite as crispy as cooking smaller batches.
Option 3: Keep the First Batch Warm
If you’re making multiple batches, don’t worry about the first batch getting cold.
Simply place the cooked fries on a baking tray in a warm oven (around 90–100°C) while the next batch cooks.
This keeps them warm without making them soggy.
Tips for Crispy Fries When Cooking Large Quantities
If you’re preparing fries for a family gathering or party, these tips can make a big difference.
- Leave a little space between fries whenever possible.
- Shake the basket several times during cooking.
- Avoid pressing fries down into the basket.
- Finish with 2–3 minutes at a higher temperature for extra crispiness.
- Season only after all the batches are finished.
These simple habits help maintain the texture you’re aiming for.
Expert Tip
If you’re regularly cooking for four or more people, consider investing in a larger-capacity air fryer or a dual-basket model.
These appliances provide more cooking space, allowing hot air to circulate freely around the fries and produce crispier results in a single cooking session.
Best Way to Cook Frozen Fries in Air Fryer (Expert Verdict)
After testing different cooking temperatures, basket loads, and cooking techniques, one thing becomes clear:
The best way to cook frozen fries in an air fryer isn’t about following one exact cooking time. It’s about combining several simple techniques that work together to produce consistently crispy fries.
If you remember only one section from this air fryer frozen fries guide, make it this one.
What Actually Works Every Time
The most reliable method is surprisingly simple:
- Start cooking at 180°C (360°F).
- Spread the fries in a single layer.
- Shake the basket every 4–5 minutes.
- Increase the temperature to 200°C (400°F) during the final 2–3 minutes.
- Season immediately after cooking.
This approach consistently delivers fries that are:
- Crispy on the outside
- Soft and fluffy inside
- Evenly cooked
- Golden brown instead of pale
The Ideal Method for Consistent Results
Here’s the complete process we recommend.
Step 1: Cook Straight From Frozen
Never thaw frozen fries before placing them in the air fryer.
Cooking from frozen helps maintain the texture and prevents the fries from becoming soft before they begin to crisp.
Step 2: Don’t Overcrowd the Basket
Allow enough room for hot air to circulate around every fry.
More airflow means better crispiness.
Step 3: Shake Frequently
Shaking every few minutes ensures all sides of the fries are exposed to the circulating hot air.
This creates even browning and prevents sticking.
Step 4: Finish With Higher Heat
The final burst of heat helps remove any remaining surface moisture and gives the fries that satisfying crunch.
It’s one of the easiest ways to improve your results withut changing the overall cooking time.
Step 5: Serve Immediately
Frozen fries are at their best within the first few minutes after cooking.
As they cool, steam trapped inside the fries begins to soften the crispy exterior.
For the best eating experience, serve them while they’re still hot.
Why the Air Fryer Beats the Oven for Frozen Fries
Many people wonder whether it’s really worth using an air fryer instead of an oven.
After extensive testing, the answer is yes.
Here’s why.
Faster Cooking
An air fryer typically cooks frozen fries in 10–20 minutes, while most ovens require 20–30 minutes, plus preheating time.
Crispier Texture
The concentrated hot air circulating inside an air fryer removes moisture more efficiently than a conventional oven, producing a crispier exterior.
Better Energy Efficiency
Heating a compact air fryer requires less electricity than warming an entire oven, making it a practical choice for everyday cooking.
More Consistent Results
Air fryers provide more even heat circulation, reducing the chances of burnt edges and undercooked centers.
Easier Cleanup
Most basket-style air fryers have removable non-stick baskets that are much easier to clean than large oven trays.
Expert Verdict
If you’re looking for the best way to cook frozen fries in an air fryer, keep the process simple:
- Cook fries directly from frozen.
- Avoid overcrowding the basket.
- Shake the fries regularly.
- Finish at a higher temperature for maximum crispiness.
- Serve immediately while they’re hot.
Follow these steps, and you’ll consistently enjoy crispy, golden fries with a fluffy interior—without the extra oil, long cooking times, or uneven results often associated with conventional ovens.
For most households, an air fryer isn’t just a faster alternative to an oven; it’s the easiest and most reliable way to cook frozen fries. Once you’ve found the settings that work best for your appliance, you’ll be able to recreate restaurant-quality fries whenever the craving strikes.
Frequently Asked Questions (FAQs)
How long do frozen fries take in an air fryer?
Frozen fries typically take 10 to 20 minutes to cook in an air fryer, depending on their thickness and the cooking temperature. Thin shoestring fries usually cook in 10–12 minutes, regular-cut fries take 12–15 minutes, while thick steak fries may need 15–20 minutes. For the crispiest results, shake the basket every 4–5 minutes and finish the last 2–3 minutes at 200°C (400°F).
What temperature is best for air fryer fries?
The best temperature for cooking frozen fries in an air fryer is 180–200°C (360–400°F).
- 180°C (360°F): Best for thick-cut or steak fries because it cooks the inside evenly.
- 190°C (375°F): Ideal for regular-cut and crinkle-cut fries.
- 200°C (400°F): Best for thin fries or for the final few minutes to achieve a crispy, golden finish.
For the most consistent results, start cooking at 180°C and increase the temperature to 200°C during the last few minutes. This method creates a fluffy interior with a crispy exterior without burning the fries.
Can you cook fries without oil?
Yes. Most frozen fries can be cooked in an air fryer without adding any oil. That’s because they are usually pre-cooked and lightly coated with oil before they’re frozen.
Conclusion
Cooking frozen fries in an air fryer doesn’t have to be complicated. Once you understand a few basics—using the right temperature, avoiding an overcrowded basket, shaking the fries regularly, and finishing with a higher heat—you can enjoy consistently crispy, golden fries every time.
The best part is that there’s no single “perfect” setting for every air fryer. Different brands, basket sizes, and frozen fry varieties may require small adjustments. Don’t be afraid to experiment with your cooking time by a minute or two until you find the combination that works best for your appliance. After a few batches, you’ll have a reliable routine that delivers the texture and flavor you prefer.
Whether you’re preparing a quick afternoon snack, serving fries with burgers, or making a simple family dinner, an air fryer offers one of the fastest and most convenient ways to cook frozen fries. It saves time, uses little to no extra oil, and produces crispier results than most conventional ovens.
We hope this Air Fryer Frozen Fries Guide has given you the confidence to get perfect results every time. Keep this guide handy whenever you need a quick reference, and you’ll spend less time guessing and more time enjoying hot, crispy fries that everyone at the table will love. Happy air frying.